
Installation of Linux virtual machine
 is your most fundamental software component of your computer.")
We will be working with a custom installed Hadoop in Linux Mint operating system, which is based on Ubuntu Linux platform, which is further based on Debian Linux distribution. In this article presentation we’ll provide an illustrated step-by-step guide for installing both Oracle VM VirtualBox (virtualization software) and how to start already pre-prepared OS with the Hadoop.
- The first thing you need to do is download the provided Linux Mint with the Hadoop. You will find in on the following link. In case of problems with large file download, please use 7-Zip-splitted files in a subdirectory there.
- Once you have clicked on the link, left-click on the file named mint-hadoop.ova. A pop-up window should appear. Save it to your hard drive, by making sure the option “Save File” is selected and than pressing “Ok”. The screenshot of the pop up window and the site is presented on the picture bellow.
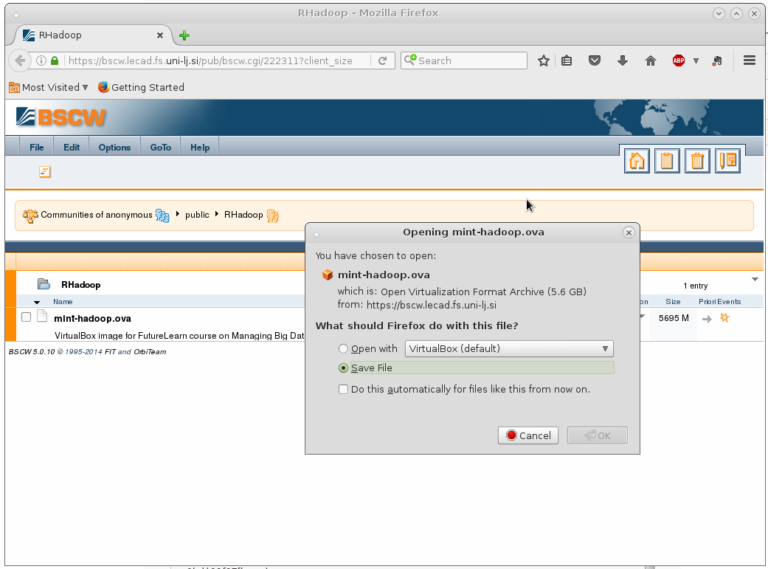
- The
.ovaextention stands for “Open Virtual Appliance” and is basically the already prepared virtual machine image, which now just needs to be loaded into the VM VirtualBox. So our next step now is to install this program (we are assuming you don’t have it installed yet, but in case you do you can skip all the way down to the last two steps). - Now it is time to first download the appropriate file Oracle VM VirtualBox packages and then install them. The easiest way to do it is just to click on the provided link. Now select the platform you are running your system on and then download the VM.
- Next, install the VM from the package you downloaded. Note that you may be prompted during installation to provide permissions to install the VirtualBox package.
- Well done! Now you only need to find mint-hadoop.ova you previusly downloaded and double left clik on it. This will automatically run the image inside the VM. Once you do that, you should get something as shown on the figure below.
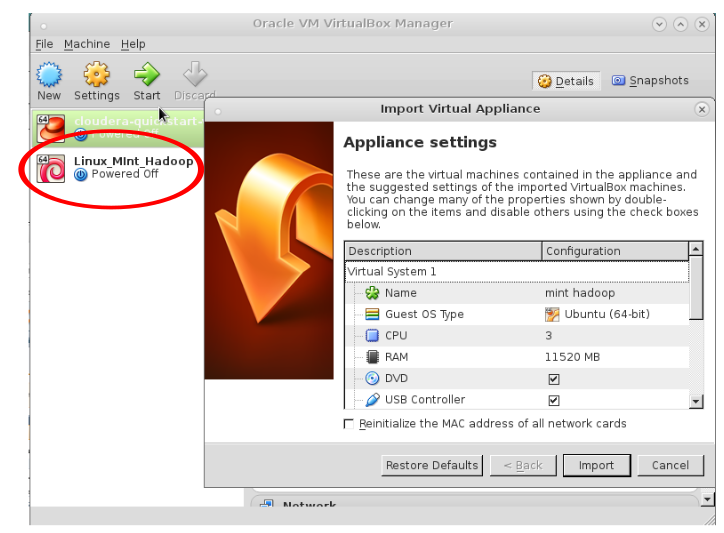
- Now before you press the button “Import”, you can customise the settings in the window titled “Import Virtual Appliance”. The only settings we recommned changing are the ones for the number of the available CPU cores dubbed “CPU” and the amount of the available RAM. We recommend at least 4GB of RAM and more than 1 available CPU core dedicated for the VM. After you do this, press “Import”. Processing the import will take a while. After the process is done you should see result similar to the figure below.
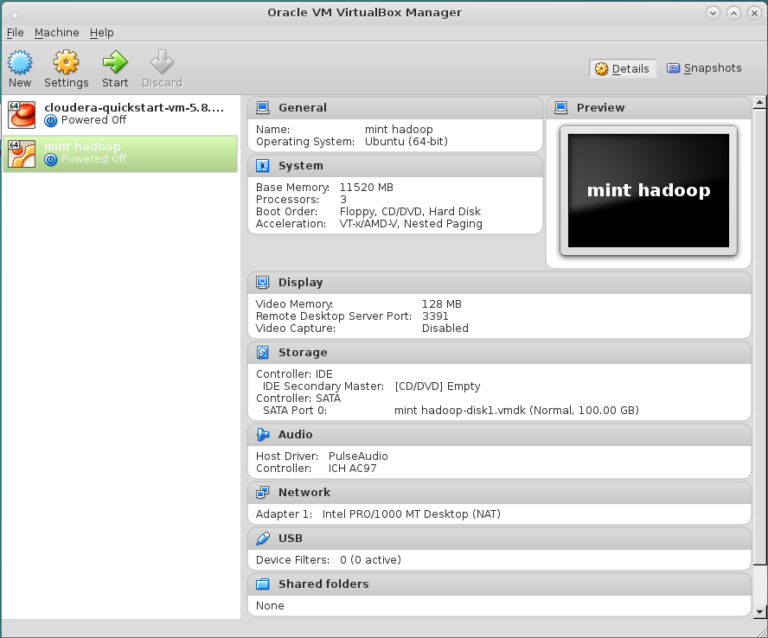
- Now press the “Start” button. Once the OS is loaded, select the “hduser”, and insert the password “hadoop”. Now continue to the Desktop and we are ready to go.
Please join the discussion that follows and post and problems during the installation and initial tests so that we know and help to solve the problems.


Reach your personal and professional goals
Unlock access to hundreds of expert online courses and degrees from top universities and educators to gain accredited qualifications and professional CV-building certificates.
Join over 18 million learners to launch, switch or build upon your career, all at your own pace, across a wide range of topic areas.


