Skip main navigation

Challenge 5: Pulling it altogether

In this challenge we will use all the features we've learnt so far: inputs, accessories and radio to create one final physical computing project.

Challenge 5: Pulling it altogether

If you’ve completed all 4 challenges, you’ve come a long way and learnt a lot! In this final challenge we’re going to pull everything from the previous challenges together.

We’re going to create a project that uses

  • multiple inputs from the micro:bit (buttons and sensors)
  • sends information over radio and
  • use other hardware

To cover all those requirements we’ve decided that we’re going to create a remote controlled car. There will be a steering wheel, pedals, indicators that we control using the micro:bit and its sensors. And there will be a car receiving all this information and reacting to it. Let’s go through the different micro:bits we’ll need and what they’ll do:

  • micro:bit 1 is going to be a steering wheel. As we tilt the wheel left and right, the car will turn – like a real car!
  • micro:bit 2 is going to be two pedals: brake and accelerator. When they are touched, the car will start and stop
  • micro:bit 3 is going to have two switches for the indicators
  • micro:bit 4 is going to be the car that receives all this information and controls a car

It’s an ambitious project! But I think we have the knowledge to complete it. Before we plan out each section at a time, let’s look at the overall big picture.

The big picture

We’re going to use the radio to communicate between all of the micro:bits. Let’s set ourselves a radio group: 33

Every action needs a unique number. When planning each section, make sure every action is sending a unique number to the car micro:bit. Otherwise we might turn left and stop at the same time.

The steering wheel

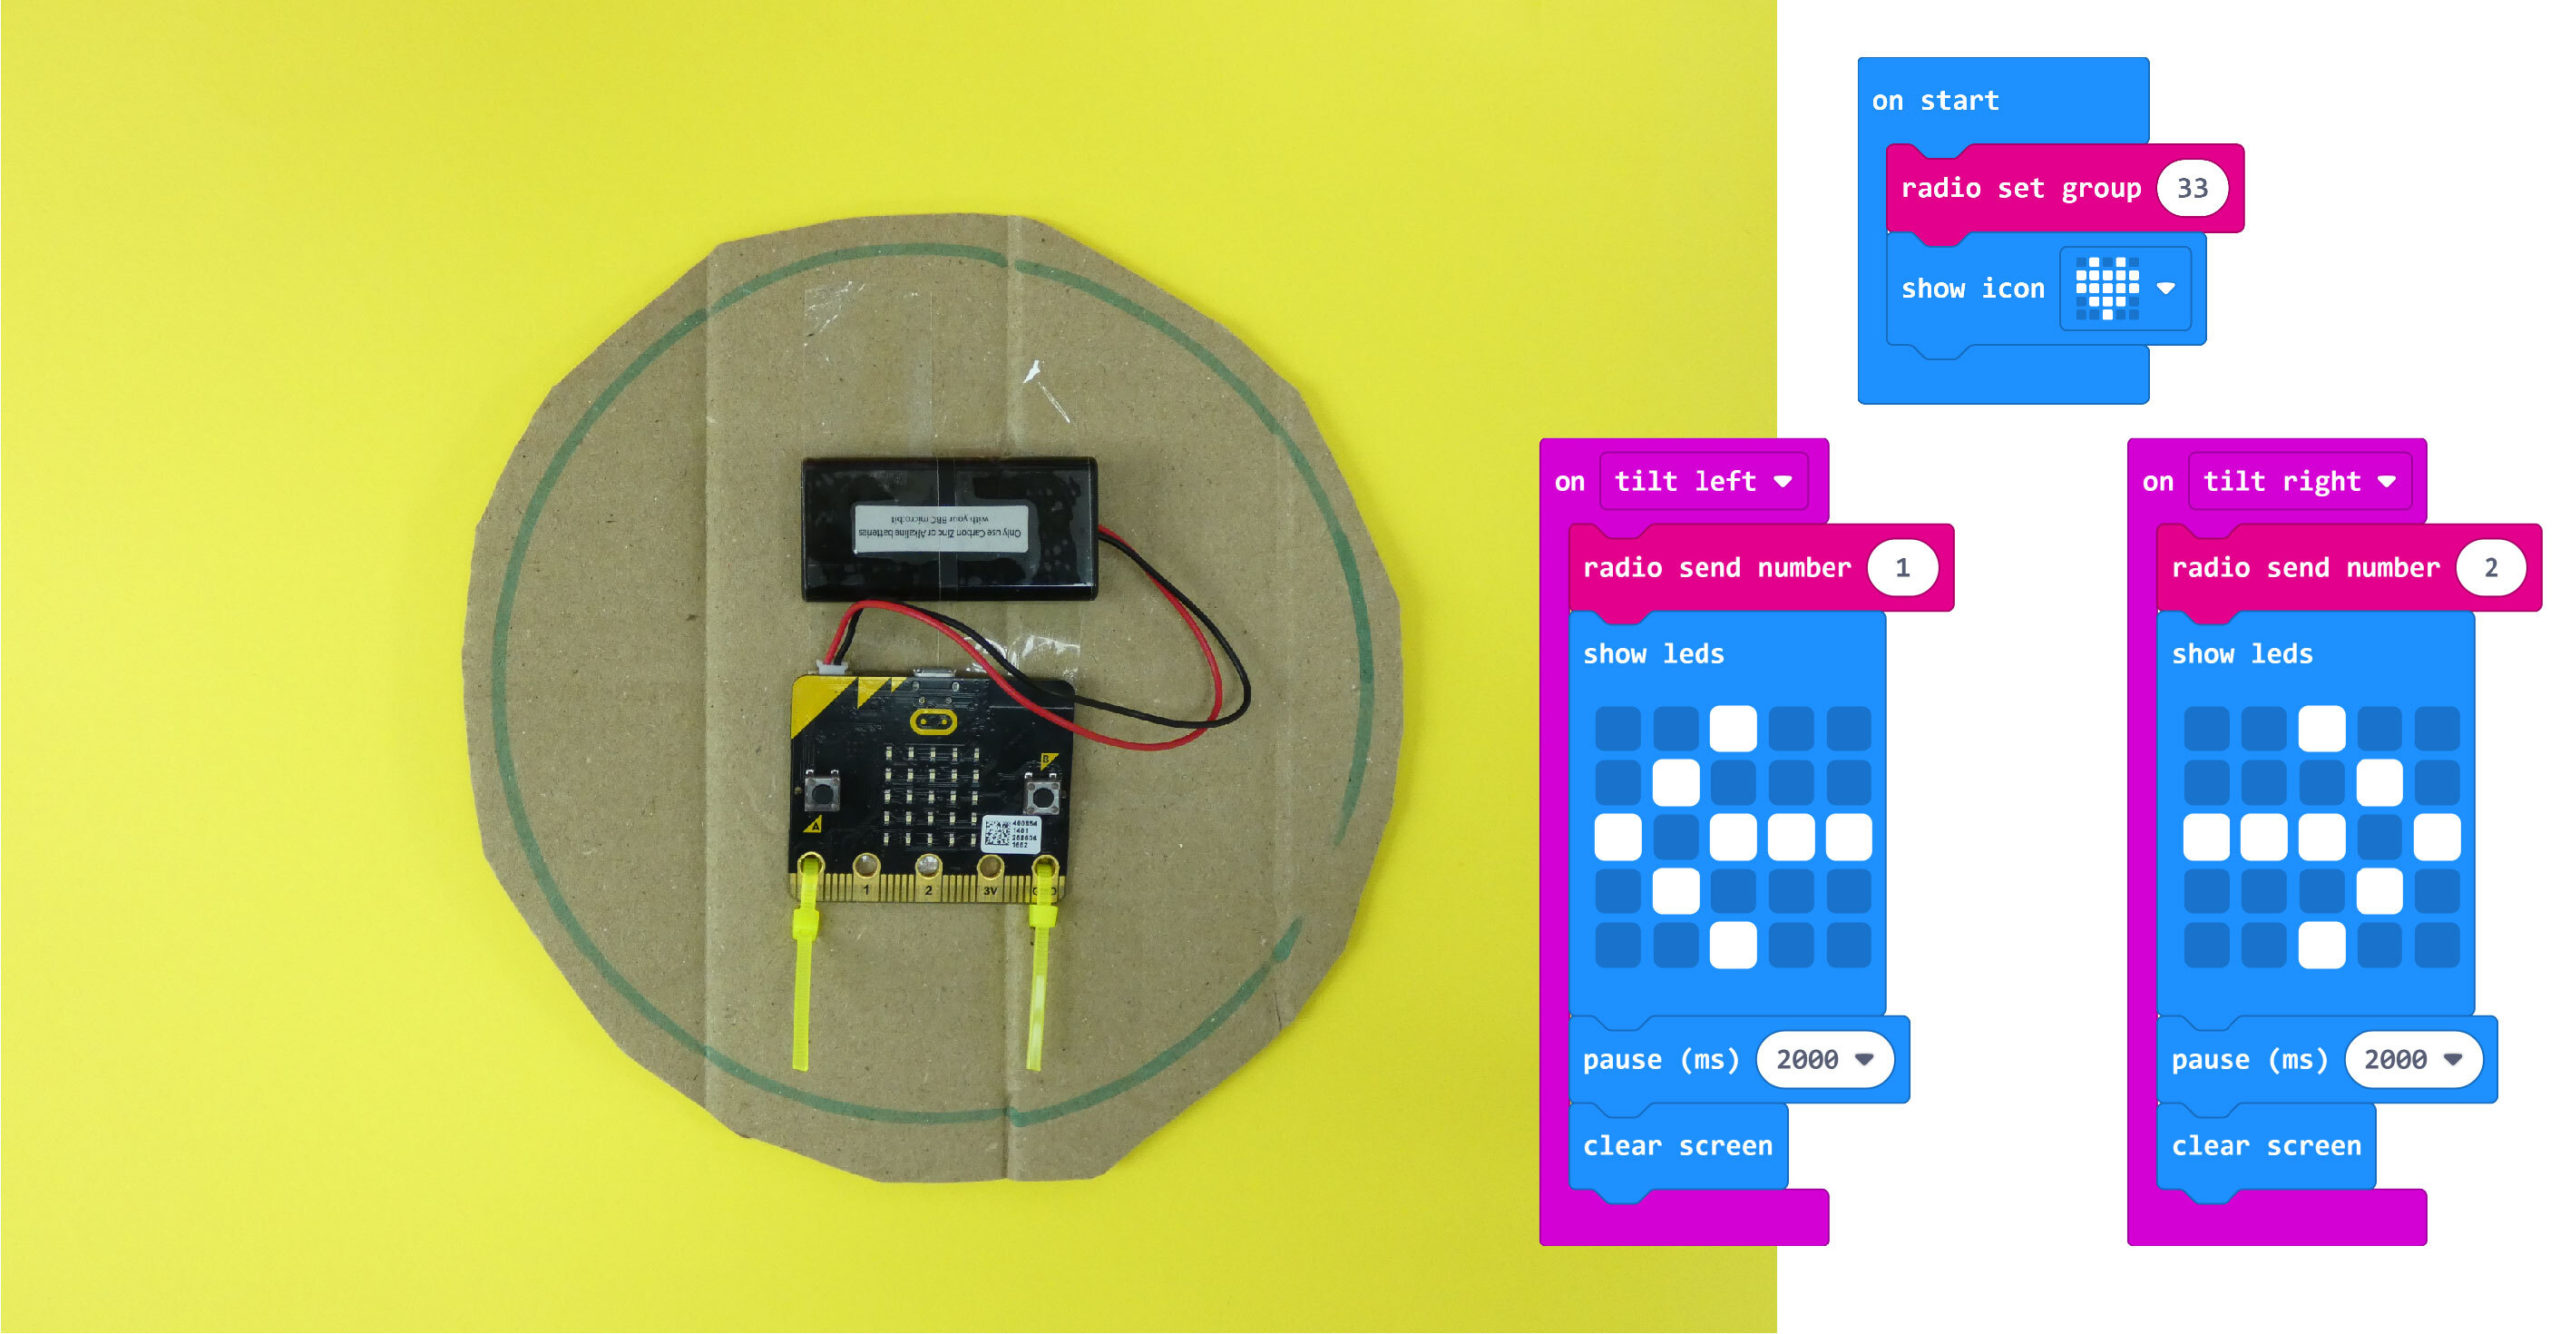
I created my steering wheel using some cardboard. I made it in the shape of a circle to give it a realistic feel. We’re going to use the accelerometer inside the micro:bit to know when the wheel has been tilted.

When we tilt left: Send 1 to the car

When we tilt right Send 2 to the car

Steering wheelSteering wheel
(Click to view the code)

Here’s the MakeCode copy of this code

The pedals

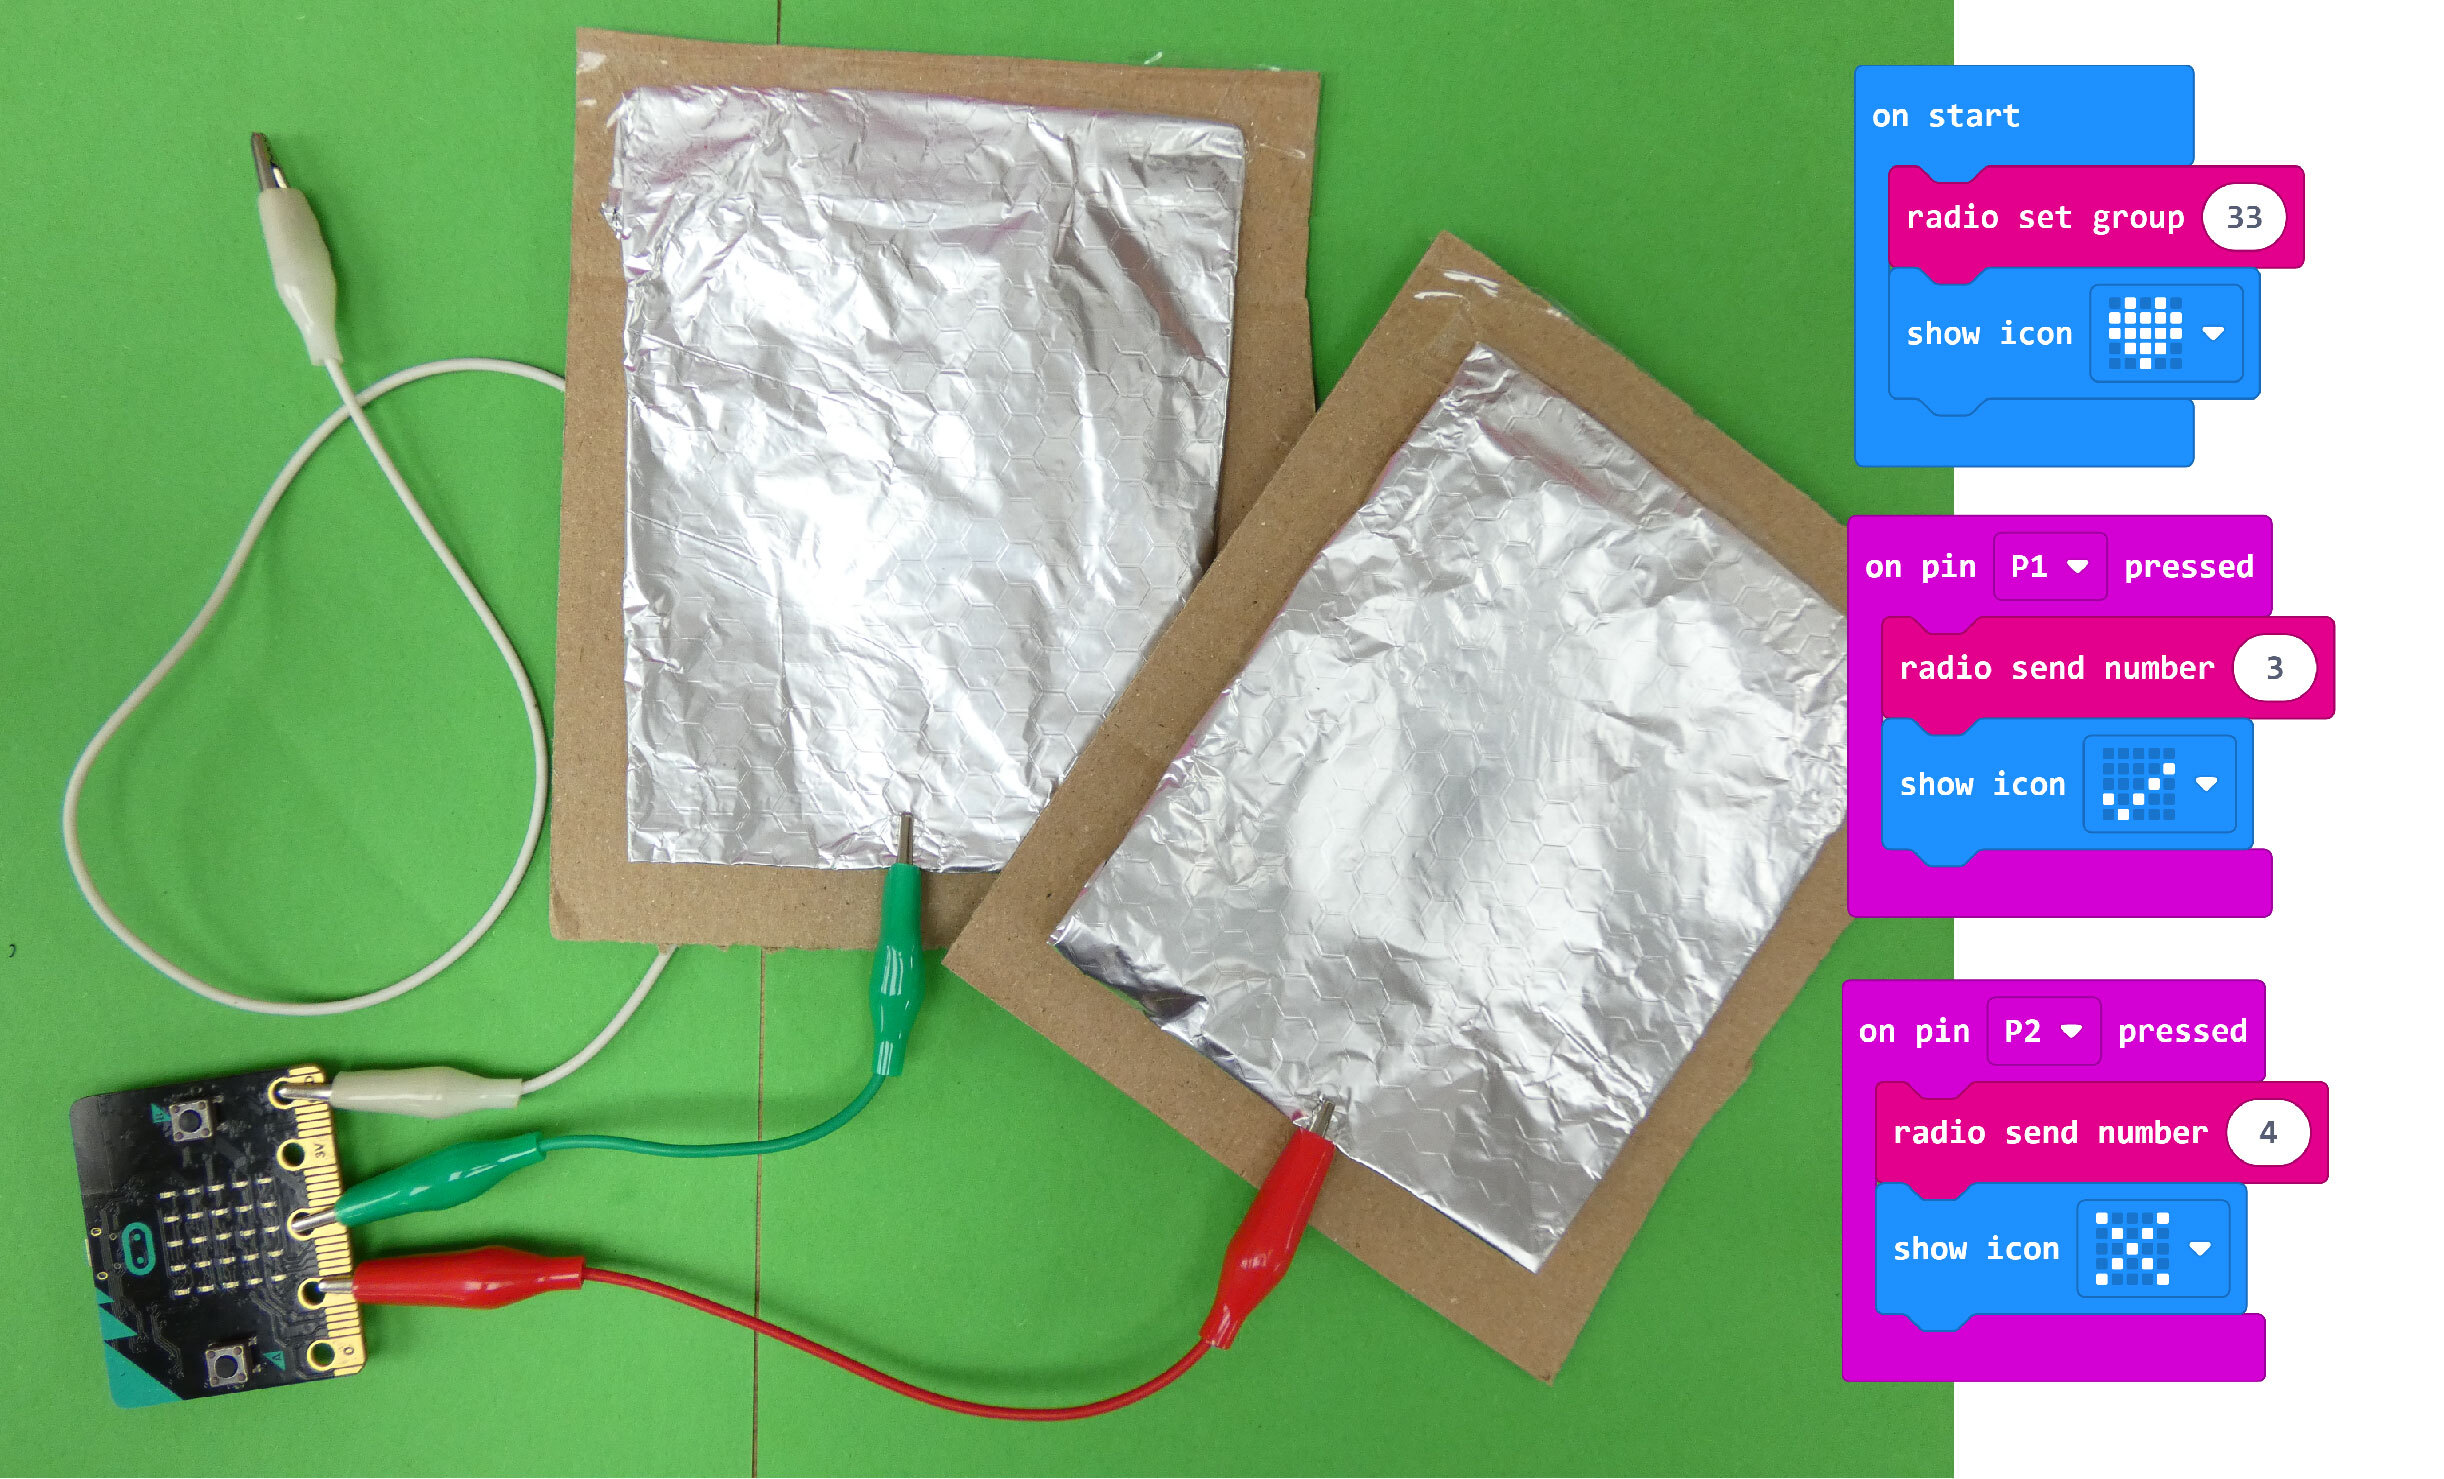
The pedals are bits of cardboard with conductive foil on them, just like the piano we’ve made before.

When we touch pin 1: Send 3 to the car

When we touch pin 2: Send 4 to the car

PedalsPedals
(Click to view the code)

Here’s the MakeCode copy of this code

The indicators

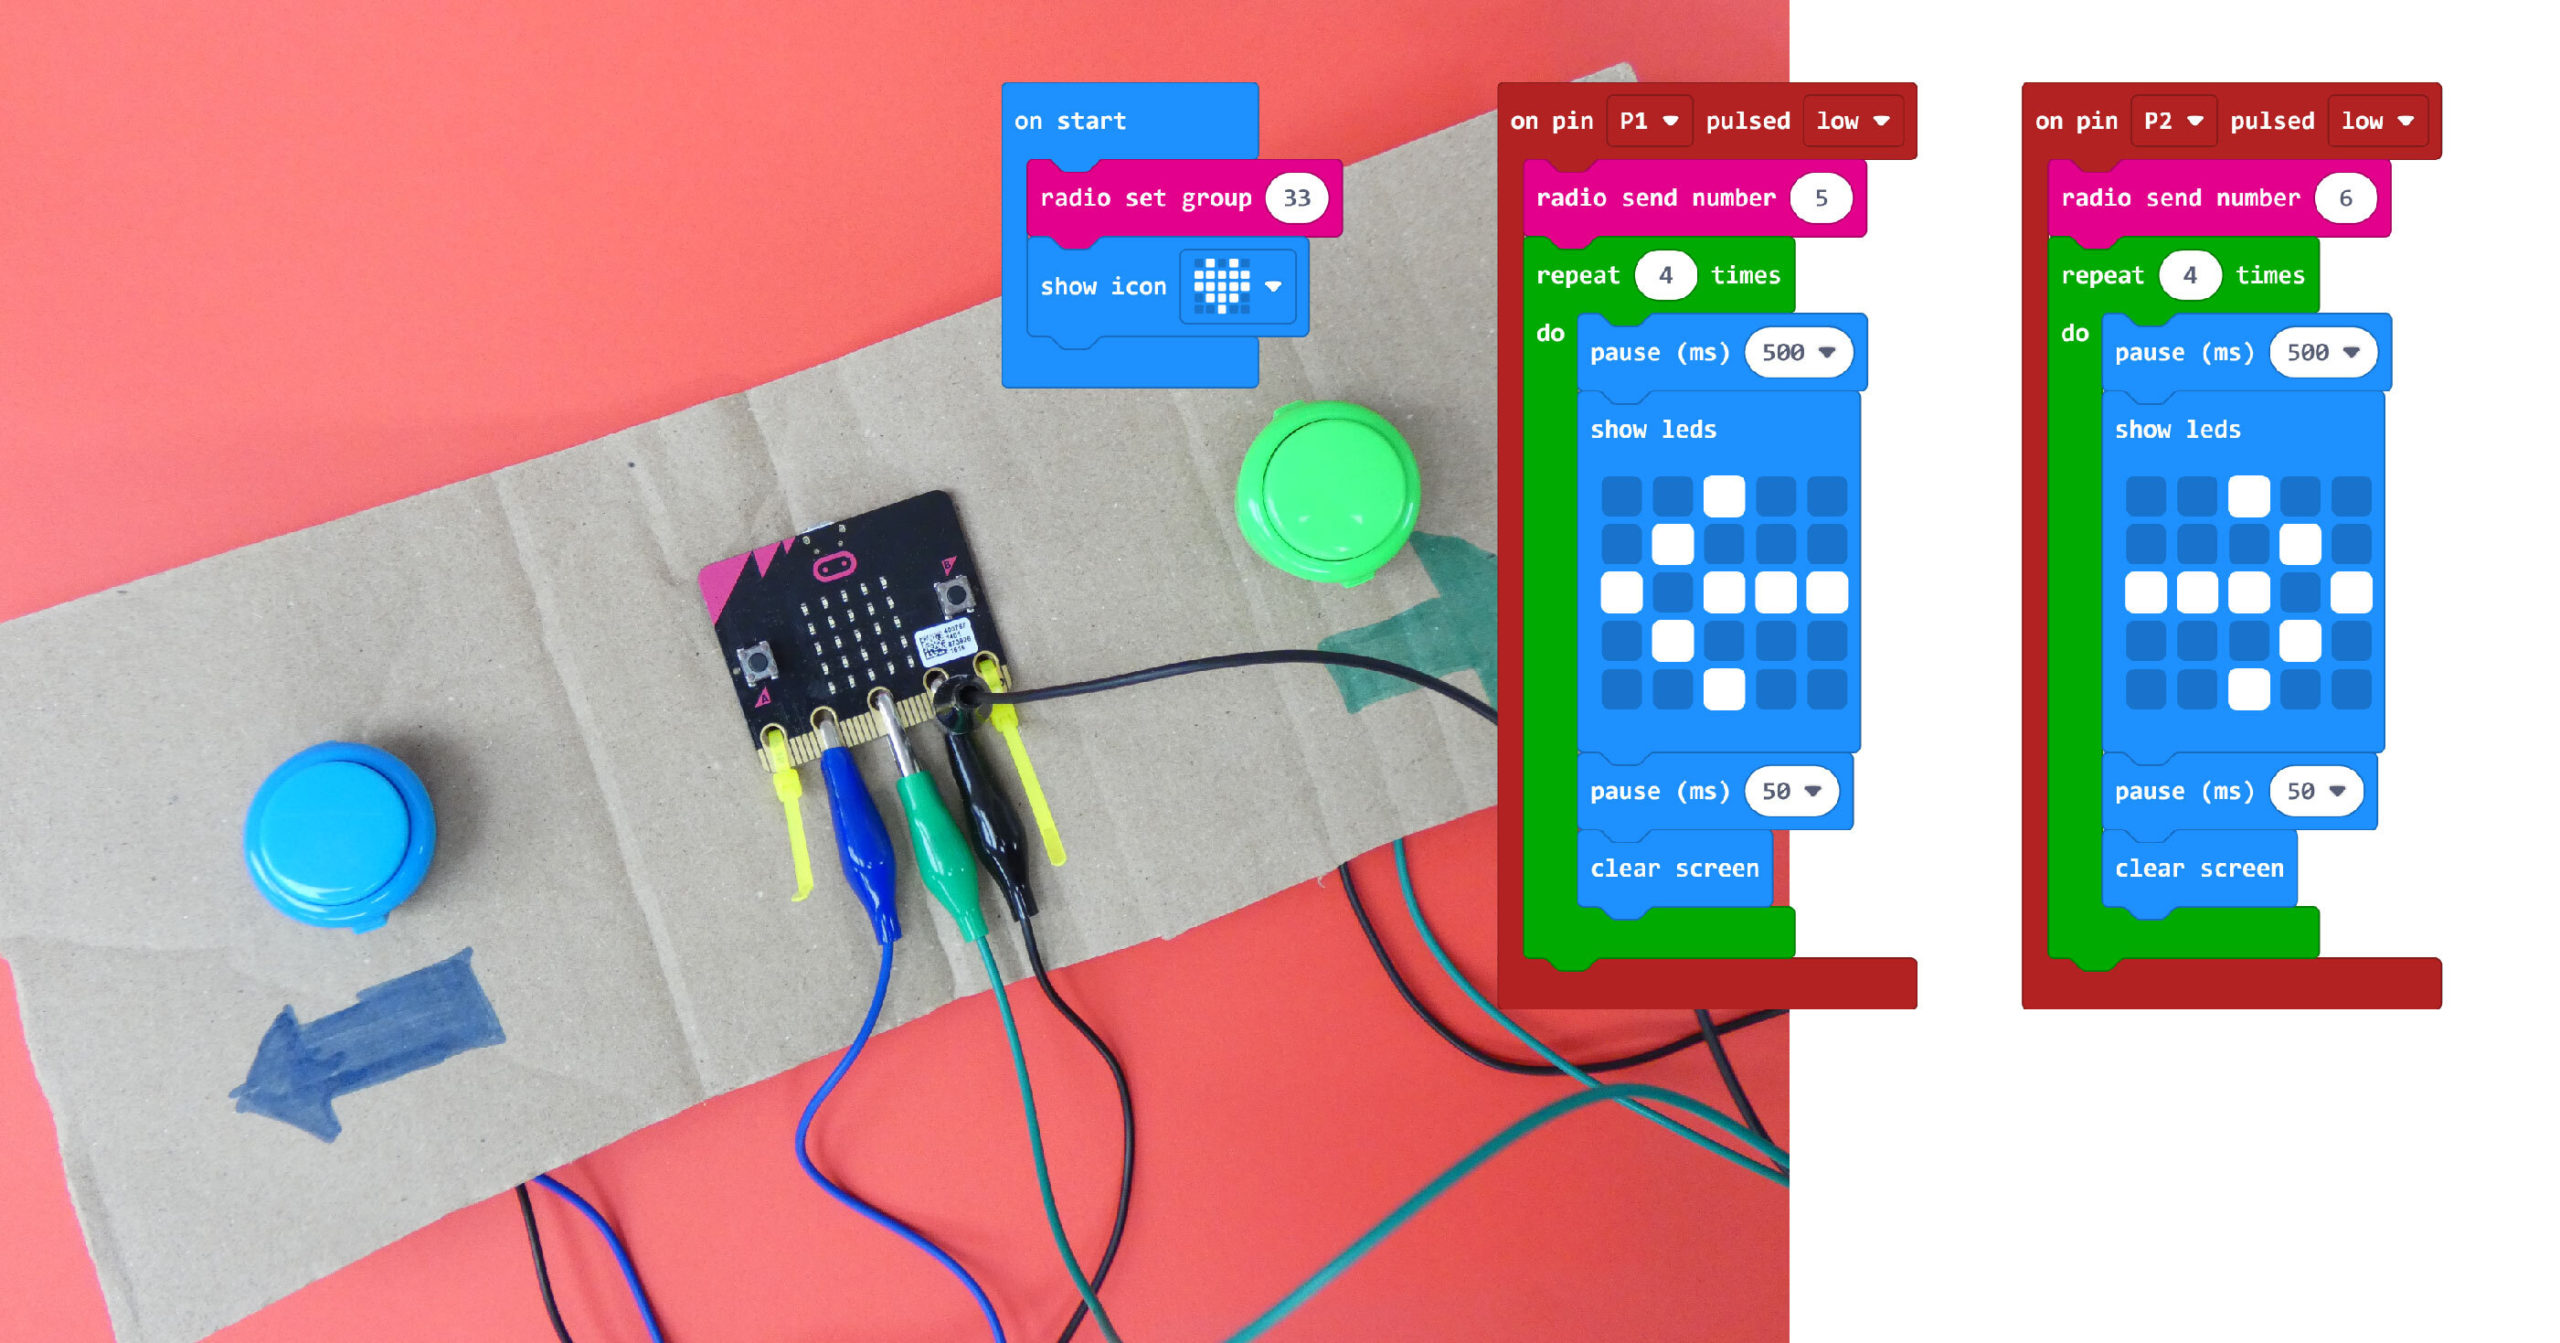
The indicators are going to be buttons we add to the micro:bit’s pins. Pin 1 is left, Pin 2 is right.

When pin 1 is pressed: Send 5 to the car

When pin 2 is pressed: Send 6 to the car

IndicatorsIndicators
(Click to view the code)

Here’s the MakeCode code for the indicators

The car

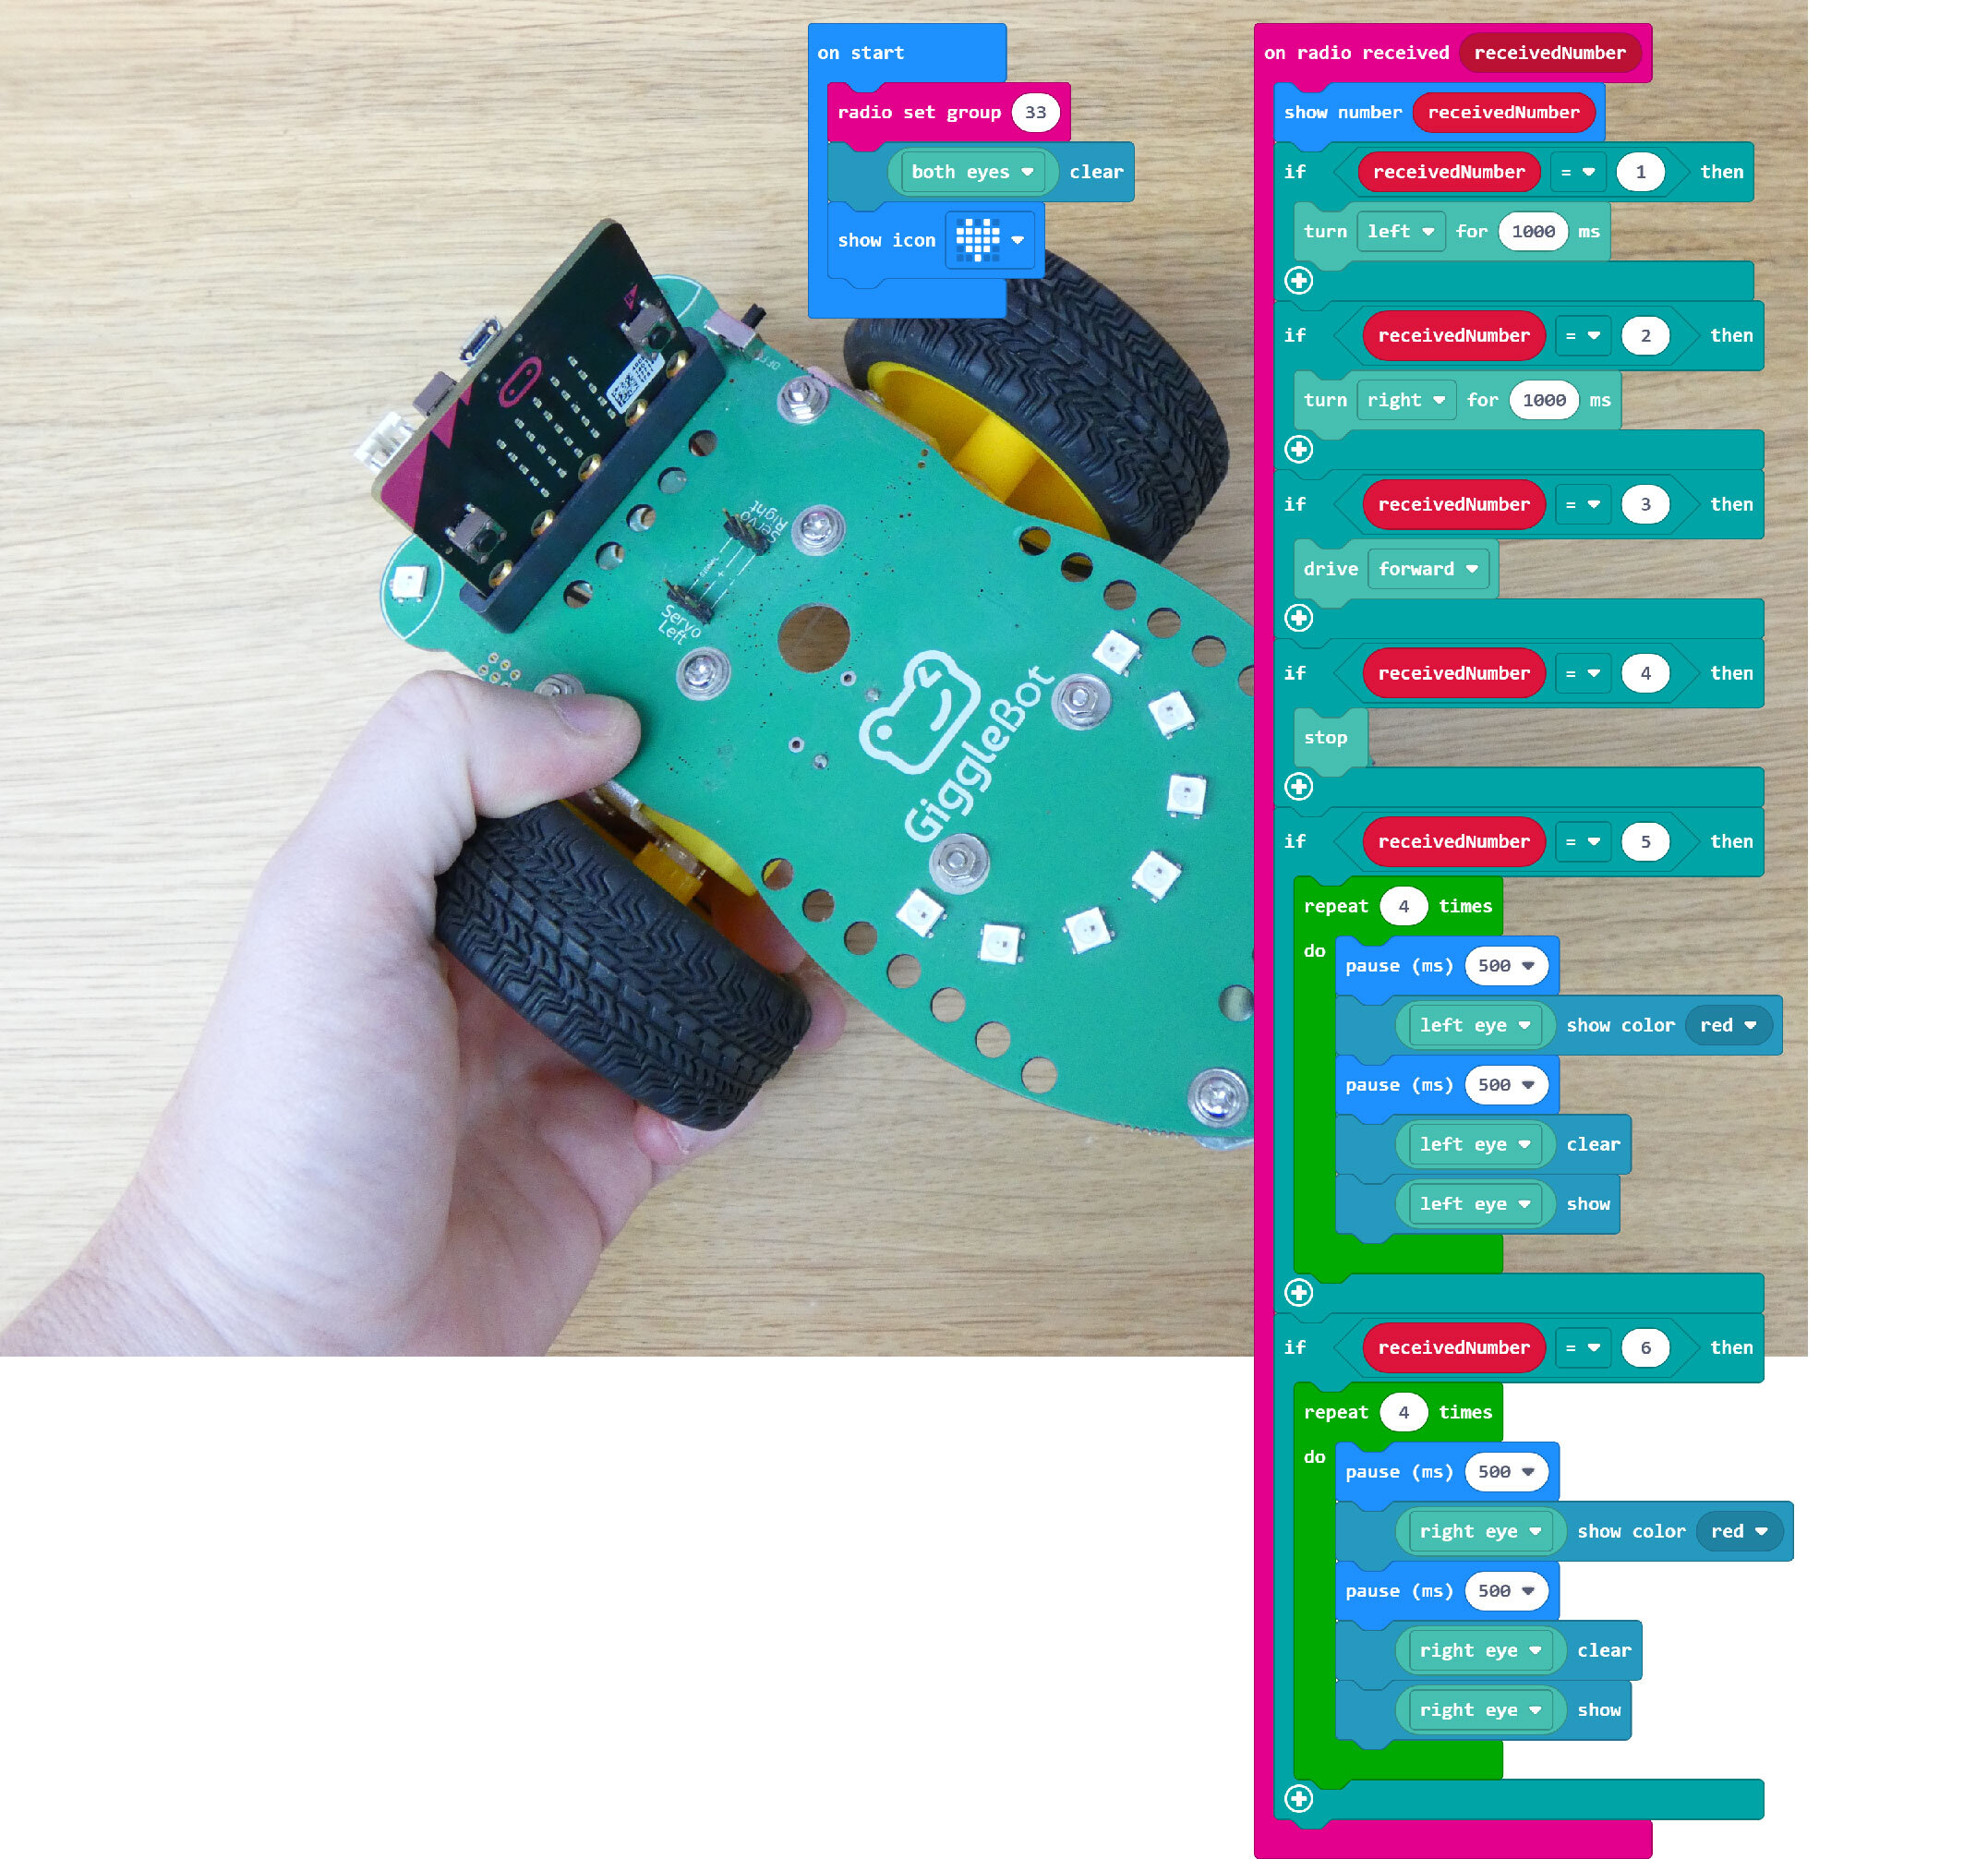
The car will receive all this information. Here’s what’s coming in and what the car does in response.

Number in Action
1 turn left
2 turn right
3 start
4 stop
5 indicate left
6 indicate right

CarCar
(Click to expand)

The first draft of this code on MakeCode

We will need to tweak some of the code as there a lot of questions with this plan.

When you press the brake on a car, you don’t come to a dead stop! You just slowly slow down. How will this work?

When will the indicators turn off?

How far left will the car turn?

But we’ve got a good plan to start us off. Watch the next video as our micro:bit car comes to life

This article is from the free online

Build a Physical Computing Prototype

Created by
FutureLearn - Learning For Life

Reach your personal and professional goals

Unlock access to hundreds of expert online courses and degrees from top universities and educators to gain accredited qualifications and professional CV-building certificates.

Join over 18 million learners to launch, switch or build upon your career, all at your own pace, across a wide range of topic areas.

Start Learning now