
Using Excel: Understanding Named Ranges

Named ranges in Excel are labels that you can assign to individual cells or cell ranges. This allows you to use range names anywhere you would use a cell or cell range reference.
For example, you can define the cell range C1:C45 as “Employees.” Now, whenever you need to enter that cell range, you do not have to remember the exact cell range. You just need to type the name that you used to define it. In addition, range names use absolute cell references. This means if you copy a formula or use AutoFill when working with named ranges, the formula will maintain its original cell reference.
Named ranges are most useful when working with formulas as they make them much more readable and improve their overall organization. In the image, cells A2 and B2 have each been given a name (Sales and Expenses, respectively). Click on cell C2. You can see the formula for that cell displayed in the formula bar:

Rather than cell references being used in the formula, there are named ranges. To someone working on this workbook for the first time, this formula is much more self-explanatory than “=A2–B2” would be.
Perhaps what is most notable about named ranges is that they allow you to construct formulas before adding the data. When you are designing your worksheet, you can create formulas using names instead of traditional cell references, and then define the names for the corresponding ranges as data becomes available.
For example, in the sample worksheet attached to this step, click to select cell A5. As you can see, this formula (=productprice*product count) results in a #NAME error. This error will remain visible until both named ranges in the formula have been defined:
Defining Named Ranges in Excel.
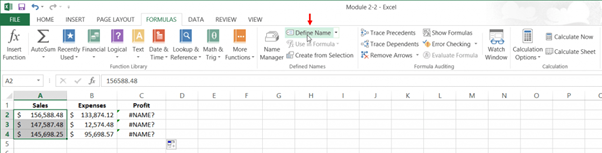
To define a range name in Excel, you first need to select the cell or range of cells that you would like to work with. For this example, select cells A2-A4 in the sample workbook. Next, click Formulas → Define Name (not the drop-down arrow):
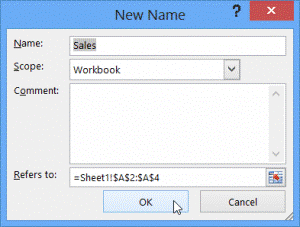
This action will open the New Name dialog box. Here, you can give the new range a name, select which part(s) of your workbook that this range will reference, and add comments. By default, if the cells are all in one row or column, the Name field will be filled in with that column or row’s header (if one has been defined).
In this example, you can see that the Sales header has been inserted into the Name field. Leave the default settings unchanged and click OK to apply the new named range:
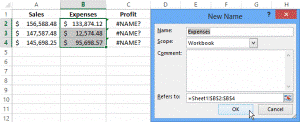
You will now be returned to the worksheet you have been working with. Repeat the above steps to define “Expenses” as the named range for cells B2-B4:
You will now see that the formula that was based upon named ranges has changed to incorporate the values you just defined:
Editing Named Ranges in Excel.
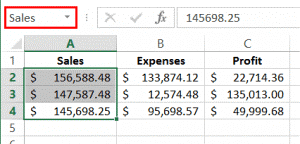
Once a named range has been defined, you can see the name in the name box (next to the formula bar) when the cell or cell range in question has been selected. For this example, select cells A2-A4. You will see that they have been named “Sales:”
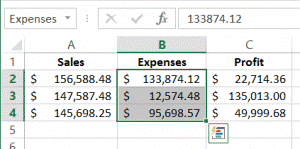
To quickly select a named range in the current workbook, click on the name box arrow and select one of the options listed. For this example, choose Expenses:
The entire Expenses range is now selected:
The data within this range may now be modified in any way that you would like. If you insert rows or columns into the range, they will automatically be incorporated. To modify the named ranges themselves, click Formulas → Name Manager:

The Name Manager dialog will be displayed. Here, you will see all named ranges inside the current workbook:
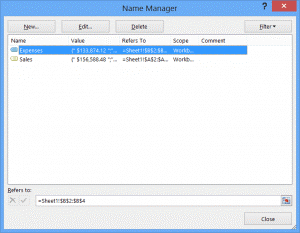
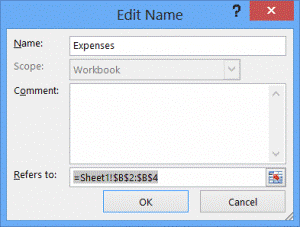
Let us edit the Expenses range. Click its name to select it and then click Edit:
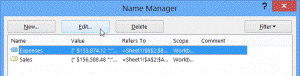
The Edit Name dialog will now be displayed. Here, you will see controls to change the name, add comments, and change the range of cells:
Click Cancel to return to the Name Manager without saving any changes. In the Name Manager, click Close to return to the Excel window.
Deleting Named Ranges in Excel
To delete a named range, you first need to open the Name Manager. Do this by clicking Formulas → Name Manager:
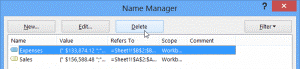
When the Name Manager dialog box opens, you will see all the named ranges in the current workbook. Delete the Expenses named range by selecting it from the list and then clicking the Delete button:
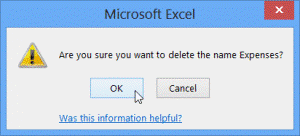
A warning dialog will then be displayed that asks you to confirm the operation. Click OK:
Deleting a named range is a permanent action. You cannot directly recover a named range that you deleted. However, if it was a recent action, it can be undone using the Undo command.
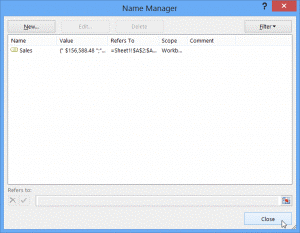
You will now be returned to the Name Manager. Here, you will see that the Expenses range has been deleted. Click Close to return to the primary Excel window:
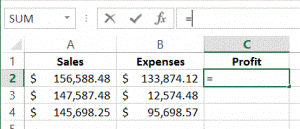
Because the formula in the Profit column uses the Expenses named range, it will now display a #NAME? error. Save the changes that you have made to the current workbook and close Microsoft Excel.
Using Named Ranges in Excel Formulas.
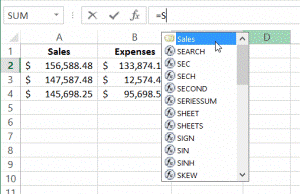
To use named ranges in formulas, begin with an equal’s sign like any formula. For this example, select cell C2 and then type an equal’s sign in the formula bar:
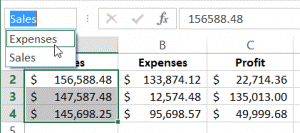
Next, start typing the name of the named range that you would like to use. For this example, start typing “Sales.” A drop-down list will be displayed with several suggestions to choose from. Double-click Sales:
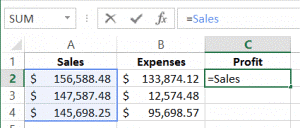
After a named range has been typed into the formula bar, it will be color-coded:
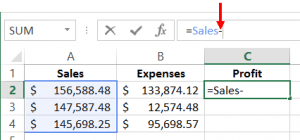
Next, you need to add an operator. For this example, type a minus sign (-):
Add the Expenses named range by typing it out fully. Once it is written out entirely, it will also appear color-coded:
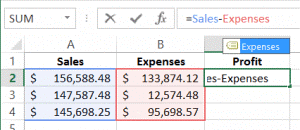
Press Enter to apply the new formula. The results will be displayed immediately:
Creating Named Formulas
In previous examples, In the Edit Name box, we used cell references in the Refers to the field to tell Excel which cells are included in the named range
You can however use the Refers to the field to hold a formula. These are often used in charting as formulas can be used to create dynamic ranges. However, in a chart, you cannot enter a formula into a series. But you can enter a name. Therefore, any dynamic ranges you wish to use as a series in a chart, can be created in the name manager and then the name used in the series of the chart.
Design and Create Custom Dashboards in Excel


Design and Create Custom Dashboards in Excel
Reach your personal and professional goals
Unlock access to hundreds of expert online courses and degrees from top universities and educators to gain accredited qualifications and professional CV-building certificates.
Join over 18 million learners to launch, switch or build upon your career, all at your own pace, across a wide range of topic areas.


