Home / Healthcare & Medicine / Coronavirus / COVID-19 Critical Care: Understanding and Application / Airway Trolley
Airway Trolley
Airway trolley video
2.5
So after the National Audit Project 4 of about 10 years ago, it was recommended that all critical care areas have standardised airways trolleys. And this means that the kit is standard. Say, that the medic is going from area to area within a NHS organisation would be familiar with the kits wherever they were. And it would be to hand, and they would be familiar with it. So that they could act promptly and quickly and be familiar with how it fits together. And so this is an NHS Lothian standard airway trolley. And it is very similar within three different NHS hospitals in and around Edinburgh.
43
So you’ll see the trolley is made up mainly of four drawers, which relate to the DAS Airway guidelines, which is the intubation checklist, and is a conversation prompter at the initiation of an intubation. Before intubation takes place, this is the checklist that’s worked through. And a plan is formulated to safeguard the patient and make sure everybody’s on the same sheet moving forward. So hopefully, it’s going to be a very straightforward intubation. But if things become more complicated than expected, everybody will be on the same page as to what the next plan of action might be and how to escalate the care of the patient. So we have here, drawer one.
89.5
We’ve got plan A, plan B, drawer 2, plan C, and then plan D is the fourth drawer. And then the fifth drawer at the bottom is a drawer that’s specialist equipment for individual areas can be kept. But otherwise, they should be standardised equipment in the first four drawers. So we’re going to start at the top of the trolley. The top of the trolley should be left nice and clear. It shouldn’t be a storage space. And it should be maintained and kept quite clean, as well. So it’s availability just take when required. So the first plan of any emergency intubation is to put in a gold standard airway, which is an endotracheal tube.
131
This tube safeguards the patients, because it’s got a cuff at the bottom. And so therefore, it’s going to also protect the airway, as well as enabling oxygen to be delivered to the patient. So if you are the person that is preparing the equipment, what I would say is, it’s all a conversation with the particular person who’s going to be intubating the patient. And with regards to sizes, with regards to preferences of the intubater, we can then go forward and prepare the equipment that is their preference, that they are familiar with. And they want to rely on us just to be able to use it straightaway.
169.3
So there’s a few checks that we’re going to talk about that we need to think about before we hand the equipment to the intubater. So starting off, we’ve got our basics of intubation.
188.5
So we have our endotracheal tubes. So we’ve got a variety of sizes. And again, it’s going to be dependent on the patient and the intubater which size they preferred. And so it’s always good to ask the intubater which size they would prefer, initially. And then there’s usually the smaller size available. There are a couple of checks that we’re going to perform on both the sizes of tubes. And that is, first of all, to make sure that the cuff is intact. So we’re going to fill the cuff up with NO2 or just with air. They’re going to make sure that it’s a nice even balloon, that a bit of the plastic isn’t stuck to any side.
228.2
So we’ve got a nice even symmetrical balloon. And also, we’re going to make sure that there’s no cuff leak present. And after, which is just as important as checking that, is we’re then going to remove any air from the cuff to ensure the ease of insertion. I am going to do that with both of the size tubes that have been requested.
257.1
So we’ve got a nice even inflation and no leak. And now, I’m going to withdraw the air.
265
The final part of the preparation for the endotracheal tubes is that we’re going to put lots of lubrication on the tips of the tube and around the cuff. And we should use a water-based gel. And this is OptiLube or Aquacell, it just depends on the make. And so we’re going to put lots of lubrication around the bottom of the ET tubes.
288.7
Following that, we’re going to make sure that we’ve got to have a discussion about how we’re going to secure the tube once it’s in. We’ve got a couple of different options about securing the tube. Probably the most common option for most patients is using a tie. So with a tie, we generally use a bandage. Sometimes, there are specific tie tapes that we can use. And these are great. However, there are occasions when we wouldn’t use a tie to secure the tube. And that might be if a patient has got base of skull fractures, if they have got anaphylaxis, or any condition in which, maybe, they’ve been in a fire. So they’ve got potential for swelling up at their face.
329.4
And so that could be that if the tie was tied and the swelling continues, it could actually really kind of cut into them and prevent venous drainage. Other conditions that might preclude the use of a tie is, if you’ve got a patient with end liver failure. And they’ve got an increased ICP. Or if you’ve got a neuro patient with increased ICP. And this could also reduce drainage and increase intracranial pressure. And so in these situations, we would prefer to use either a tape, which isn’t going to infringe on drainage, or we could use an Anchor Fast, which is like a sticky dressing that then can secure the tube in a clamp tight grip.
383.6
So again, these are important discussions to have before you go forward with intubation. Finally, the other consideration regarding the securing of the tube and also the patient’s condition is, if we’re going to cut the ET tube. So in some areas, the tube will never be cut. And again, that can just be the normal procedure of that area. However, for some reason, it can actually be beneficial to cut the tube if the patient’s going to be quite awake, if they’re going to be picky, and they want to reduce the amount that they can kind of grab on to. So again, what I would say, it’s probably a per-patient discussion. And it’s going to depend on the patient.
430
If the tube is cut, you can pop off the end of the tracheal tube, you can cut it to the required length, ensuring that the pilot balloon is well away. You don’t want to cut through the pilot balloon. And then once you’ve cut the tube, you then put the blue end top securely back on. Because you need to ensure that that’s nice and tight and not going to come loose. Patients where you wouldn’t cut the tube would be, again, your patients that are going to potentially swell up. You don’t want the ET tube to be lost as their face swells up– so anaphylaxis or burns patients.
462.7
But also, if you are re-intubating a patient who’s had a previous tracheostomy, you need to make sure that the tube is long enough to go past the stoma in the neck. And so therefore, you’re not going to cut the ET tube for these patients.
478.7
So other bits and pieces that we’ve got here. We’ve got to think about how we’re going to get a view of the vocal cords in order to place the ET tube. So we’ve got a couple of different ways of doing this.
493.5
We could use a Macintosh blade. So this is a direct laryngoscope. Generally speaking, and for adults, and we have two sizes of blades. We have a size 3 and a size 4. And we’re going to check both of these. And the checks are, we’re going to make sure that their nice and secure and firm, they’re not wobbly. And we’ve got a really good steady light, because it’s very dark and cavernous inside people’s mouths. So we’re going to check both of those. So these are direct laryngoscopes. They should give us a direct view of the larynx and the vocal cords. The other option is the McGrath laryngoscope. So this is a video laryngoscope.
537.8
So the check that we’re going to do, when we’re setting up the equipment with the McGrath is, we’re going to switch it on. And we’re going to come up with a picture. Now, this is a video laryngoscope. So we get a nice picture. These have got disposable blades, again, in size 3 and 4. So with the McGrath, you can use them to get a direct view, as well. So they can be manipulated, say, that the intubater can get a direct view, just as with a Macintosh blade. However, for some reason, sometimes, especially in cases of trauma, or if patients have got very limited mouth opening, it might be that you’re not going to manage to get a direct view.
580.6
And so therefore, you can get a video view without actually having to open the mouth as much as, hopefully, would be normal. And so that can be really useful. I would say a bit of kit that can go with the McGrath is the stylet. So this is a stylet.
602
Now, if you’re just getting a video view, it can be that the ET tubes can be quite soft and malleable. And you’re going to have to try and put them around the corner. So they’re not going directly into the vocal cords at the top of the trachea that you can see. So you’re going to have to put them around the corner. And because they can be quite soft, it could be that some intubaters prefer just a steadier and firmer ET tube. And the stylet can do that. It is just a very, very thick wire. So we’re going to pop it into the ET tube. We’re not going to let it come out the bottom, because it’s very hard.
638.5
And that can cause trauma to the trachea. So we’re going to just pull it back, just to be shy of the soft end of the ET tube, but then going to bend over. And then what we can do is, we can mould it to the shape of the McGrath. And then while we’ve got the McGrath in place, this, then, is not going to wobble quite so much. And hopefully, it will be able to directly follow the blade and going into where you can see on the actual video. So occasionally, the stylet is used, not often.
673.3
The other alternative to this use of the stylet is actually to use the bougie. And there’ll be other videos that will show you the use of the bougie. But basically, again, it’s a quite hard kind of tube that is going to go where you put it, rather than just kind of in effect drift away with a soft ET tube. So you can put that in position. And then this job is a two-person job. But you can railroad the ET tube over.
706
the bougie and into position. And then the bougie comes out. So either the stylet or the bougie can really helpful, and especially if you’ve got a trickier intubation.
726
A couple of other basics that we’ve got in this trolley– so we’ve got to remember that the really, really key part is actually not the placement of the ET tube. It’s not the placement of any of this equipment. The key to the airway trolley– our priority is oxygenation of the patient. So failing to place an ET tube is not going to kill the patient. But if we don’t oxygenate the patient, then that’s obviously not going to be a good end. So because of that, and to remind us of that fact, we’ve got basic airway adjunct here. So you’ve got the oropharyngeal airway, sometimes known as the Guedel airway.
764.6
And these come in three different sizes for adults, usually, 2, 3, and 4. The way that you would size a Guedel airway is going from the lips to the angle of the jaw. So you’re just going to size it up next to the patient. The way that you’re going to insert it is actually, you’re going to put it upside down. So it’s going to be in upside down. It’s going to be along at the top of the roof at the hard palate. And as it gets to the back of the tongue, we just flip it over and wiggle it into position so that the tongue is sitting neatly and nicely underneath the airway.
797.4
So these can really help, and especially if a patient is obstructing her airway and while you’re getting all the equipment ready. And what I would say is that these can be quite a good test of GCS. Once you start to insert the Guedel or the oropharyngeal airway, if they start to wake up and retaliate, then it’s not for them. Because what you can do is stimulate the vagus nerve and they can vomit. And it’s going to make the situation much worse. So if it’s apparent that the patient isn’t going to tolerate one of these, then don’t proceed. And that’s not appropriate at that moment in time. We’ve then got also our face masks.
838.3
And these, again, come in a couple of different sizes.
847.4
We’ve got a catheter mount at the side. So hopefully, when the ET tube is in, this can go at the top. And it can either connect to a C-circuit or a bag. Or it can connect to a ventilator. So that’s the catheter mount. We’ve got the Magill forceps. So the Magill forceps can be really handy if there’s been a foreign body inhaled. And you can try and pluck it out. If there have been teeth that have come loose, and they can be plucked out, as well. And also, they can also help after the ET tube is in position to insert an NG tube for the patient.
886.8
So finally, an optional extra in the top drawer of the airway trolley would be a cuff manometer. And so once the ET tube is in position, we can connect it up to the cuff and make sure that we have got the appropriate amounts of air in the cuff. And so that it’s in the green space to prevent any trauma to the trachea, and to ensure that we’ve got a good seal, as well.
914.8
So our plan A is always going to fit an ET tube in if the patient is needing an emergency airway secured. However, I would just draw your attention to the front of the drawer. There’s a maximum of three attempts. So it’s very easy for intubaters to get lost in time and to get focused and fixated on the task. And this is why we’ve got this kind of plan in the forward of these drawers. And it’s to prompt us to realise, actually, if we’re not succeeding in one approach to securing an airway, there are different alternatives. And we just need to keep on moving on. So we can have a maximum of three attempts.
958
And then the team together can be accountable for making sure that we then move on to the next plan. And that would be plan B. And that would be the second drawer down. So plan B would be maintain your oxygenation through a supraglottic airway device. So in this drawer, we have a couple of options. Now I-gels are quite preferred at the moment. They are the preferred option. And it’s the I-gels that are going to be present in most arrest trolleys. So the I-gel is a supraglottic airway device, in that it doesn’t protect the airway. Because there is no cuff involved.
1001.1
But what it does do is, it goes in, again, you insert it over, and kind of just underneath and around the hard palate. And it sits just over the top of the trachea. And we can deliver oxygen through this device. The I-gel has got a couple of additional bonuses to it. And it’s got a bite guard. So that if the patient, for some reason, does become awake and start to become quite irritated and quite combative, the patient shouldn’t be able to bite through the bite guard. There’s also a little hole in here. And if we put in an NG tube. And that should be directed towards the oesophagus.
1042.9
And so if the patient has got any gastric contents, we should be able to suction out the gastric contents, and lots of lubrication. And a thin NG tube going through there can help with that. The I-gel and actually, all these supraglottic airway devices all go by ideal body weight. And these are really handy. You’ve got ideal body weights on them. So this small size 3 is for 30 to 60 kilogrammes. And probably, a lot of people are going to be size 4 or 50 to 90 kilogrammes. And size 5 is 90-plus kilogrammes.
1085.3
So when these go in, you’ve got a very soft gel that is around them. So it’s quite common when the patient– when they’re in situ, for the bag to be bagged, there might initially be a bit of a leak. And you might think, oh, I’ve got it in the right place. But actually, it just takes about 30 seconds or so for this gel to mould with the patient’s body temperature and to form a nice seal over the top of the airway. And so therefore, don’t worry too much if there’s a bit of a noise, initially. It should settle down. The way that we prepare these devices is lots of lubrication on the top of it.
1125.6
So the way that they are going to go in is, the patient is going to be lying with their mouth open. It’s going to be just inserted and go around the back of the hard palate and in. So it’s the lubrication on the back. You want to make sure that you don’t occlude the inner part of it with lots of lubrication. Because obviously, that’s the airway. So you just want to make sure that really it’s on the outer part. So the I-gels are a great option. However, I-gels unfortunately, don’t work for every patient. And for some reason, some patients then seem to fit the LMA mask and supraglottic airway device a bit better So again, these come in three sizes.
1167.9
And again, you’ve got the sizes and the weights indicated on each tube. So these are a little different in that they’ve got a cuff to keep them nicely positioned on top of the airway. So these will come nicely inflated. Occasionally, they don’t come inflated. And again, you’re going to have to check that the cuff inflates so that there’s no cuff leak, and that you’ve got a nice symmetrical cuff present. In order for them to be inserted, the cuff needs to be down. And also, lots of lubrication on the outer parts and they go in very similarly to the I-gel. But once they’re in position, then it’s going to be the assistant’s job to then inflate the cuff.
1219.4
And you can see that as the cuff inflates, it’s quite big, actually. So once the cuff is inflated, the LMA can actually come up a little bit. And it’s not to worry. It’s not that it’s in the wrong place or something’s happening. It’s just that it’s quite normal just for the cuff being inflated.
1240.5
These LMAs don’t have the advantage of having a bite guard. They’re quite soft. And so if a patient does wake up and start clenching down, and they can actually obstruct their own airway. And also, there’s no option to put an NG tube down with the LMA. So you can see here, we can have two attempts at an I-gel and one attempt at the LMA. It’s probably a good idea, if you’re going to have two attempts at the I-gel, but you actually use different sizes of I-gel, you might go to a smaller size if you’ve used a size 4 or 5, and then one attempt with the LMA. So that is plan B.
1278.1
So the point of plan B is that you are trying to get to the point where you’re oxygenating your patient. So these I-gels or the LMA supraglottic airway devices are going to hopefully buy you time. You’re going to be able, hopefully, with their placement, to oxygenate your patient. And then, there are quite a few different methods for changing from a supraglottic airway device to an ET tube. But that can be done with the right people around, and with expertise around, and once the patient has been optimised for that.
1313.5
So these buy you time, and can buy you up to a few hours and to make sure that the patient has got to a stable place before you start thinking about actually what potentially needs to happen next. So if the I-gel placement or the LMA placement has been successful, this then leads us to a stop-and-think moment. And we have four options. And these are very handily on the side of the drawer. So our first option is to wake the patient up. And usually, within a critical care environment, the patient is actually being intubated for a reason. Because they are becoming unstable, and they need support and oxygenation. So usually in a critical care environment, this is not an option.
1359.6
However, if you are in a theatre environment, for example, in an elective operation, this might well be an option. The second option might be to intubate via a supraglottic airway device and going forward with an entry and catheter conversion to an ET tube. The third option might be to proceed and without intubating. And the fourth option might be a tracheostomy or cricothyroidotomy.
1388.9
So if plan B has not been successful, this is when we would continue down the drawer. Because our next plan is plan C. And plan C is wake up.
1404.3
So this means, actually, that plan C is all about oxygenating the patient. And again, in order to help us to think about the priority of oxygenation, this third drawer is actually completely full of just airway adjuncts that will help remind us that we’re going to have to oxygenate this patient. And let’s just do whatever it takes.
1432.8
We have a reminder that we have Guedel airways. So it could have been that initially, our patient wouldn’t have tolerated a Guedel airway or an oropharyngeal airway. But actually now, we are down onto the third drawer. They might well now tolerate a Guedel airway. And that could be potentially quite helpful. Again, we might just simply go back to and bag-valve-mask the patient with the use of our face mask. And again, these are just a visual reminder that actually, if we can just go back to basics, the important thing is oxygenation. And if that is just using a C-circuit or a bag-valve mask, then that’s absolutely fine. And let’s do that. The other airway adjunct are the nasopharyngeal airways.
1481.9
So these can be very useful if there’s maybe been facial– if we can’t get an oropharyngeal airway in. Or if the patient is still quite combative, these can be tolerated by patients that are quite alert and awake.
1500.7
So the nasopharyngeal airways come in two sizes on the airway trolley– size 6 and a size 7. It used to be that we use to measure the patient’s noise and things for these. But actually, generally speaking, we say now, is it’s a size 6 for a female and a size 7 for a male. And that’s quite normal. When the NP airways– or the nasopharyngeal airways are inspected, lots and lots of lubrication is really helpful. So the nose needs to be checked for any septal deviation to see if the patient has got a history, possibly, of any nodes or polyps at the back of the nose.
1550
And also, it is very important that we check if the patient is on any anticoagulation. The back of the nose is an extremely vascular area. So while these can be a real asset to maintaining the patient’s oxygenation, we also don’t want to cause any trauma to the back of the nose, which is going to result in loss of fresh blood coming around in the airway, which could really be very unhelpful. So we’re going to check the medication that the patient is currently on. If you’re in any doubt about that, then we’ll check with the medics before one of these is inserted. In order to insert, it’s basically you’re aiming at the back– well, it’s kind of to the ear.
1591.9
It is very, very gentle. It’s never forced. Sometimes very gentle twisting the connection can help. And it needs to go up and over the back of the nose and then down again. So once you’re over that corner, it’s just generally a little bit easier. But sometimes, it can be quite sore for the patient going over just the back of the nose. But these can be very helpful in some situations.
1623.1
If a trauma is caused and the patient does start to bleed from their nose, it’s better to leave NP airway in situ rather than take it out. And hopefully, that would cause a tamponade effect and stop the bleeding sooner than if it was withdrawn.
1646
So if plan A has failed, if plan B has failed, if we’ve done our best to buy some time by oxygenating the patient, and we are not making progress on that, then we need to go down to plan D. So plan D is emergency front-of-neck access. And this requires a scalpel, a bougie, and a tube.
1670
What I would say is that probably, it says to ask surgeons to attend here. But probably, you’re going to be thinking about asking for assistance back up here in plan B if things are looking as if they might be getting potentially difficult. So probably up in the second drawer, you need to be asking for support. And especially here, we’re going to be asking surgeons to attend as soon as possible. If we’re going to go into emergency front-of-neck access.
1706.4
So in NHS Lothian, we have a standard airway emergency frontal access kit. But I’m going to show you what the DAS guidelines actually recommend.
1721.3
So the DAS guidelines recommend that you have a scalpel, that you have a bougie, you have a size 6 ET tube, and that you have a syringe. So hopefully, all of these things are easily accessible and within actually any ward environment. So the scalpel should be a size 10, or it should be a size 20. Either of these will be fine. So the scalpel should be handed to the intubater. And they are going to cut a horizontal line into the cricothyroid membrane. So that’s going to be cut. And they’re then going to twist the scalpel 90 degrees. And then the bougie then just goes down through that, down into the trachea.
1773.7
And it’s just progressed just a small amount so that it doesn’t cause any trauma to the carina or to any of the bronchi. Then a size 6 ET tube. Again, this will be a two-person job. It’s going to be fit over the bougie. It’s going to be slipped into place. And then the bougie is going to be removed. So obviously, there’s going to be quite a lot of tube sticking out from the patient. Because it’s a full-sized ET tube. But it’s an emergency, and we’re just trying to secure the airway and to provide oxygen to the patient. The cuff will then be inflated. And the cuff should be just at the top of the trachea.
1822.8
And then it should be secured. And then the patient can get oxygenated through the bag and just going directly to the trachea.
1836.3
So in NHS Lothian, we have our own emergency front-of-neck access kit, which has everything that you need in one handy bundle. So you can see we have an mini bougie, we have a scalpel, we have a tie, which is actually going to help us secure tracheostomy to this. Instead of a size 6 ET tube, we can use a specialist tracheostomy tube so this then doesn’t need to be changed as quickly as the ET tube. So the tracheostomy tie is velcro and gets secured. It goes around the back of the neck and get secured around the patient. And it holds it gently in position.
1893.2
And then finally, to connect to a bag or a ventilator, we’ve got a mini catheter mount, which then just goes over the top. So it’s worth noting that we’ve got measurements on both of our bougies. And as it’s put in after you’ve made the dissection, it’s usually between 10 and 15 centimetres that the bougie is going to be advanced. Any more than that, then you’ve got potential for causing trauma. And so that’s why it’s probably good to have smaller kits, because you’re less likely to advance it too far than with the large bougie size advantage. Another thing to say is that with the landmarking of the cricothyroid membrane, in some patients, this can be quite challenging.
1945.7
It might be that with some patients, it’s quite difficult to landmark the cricothyroid membrane. In this case, it might be that the intubater will have to dissect vertically down the neck at the neck to improve their view of the cricothyroid membrane. And so that they can go directly into the trachea.
Share this post
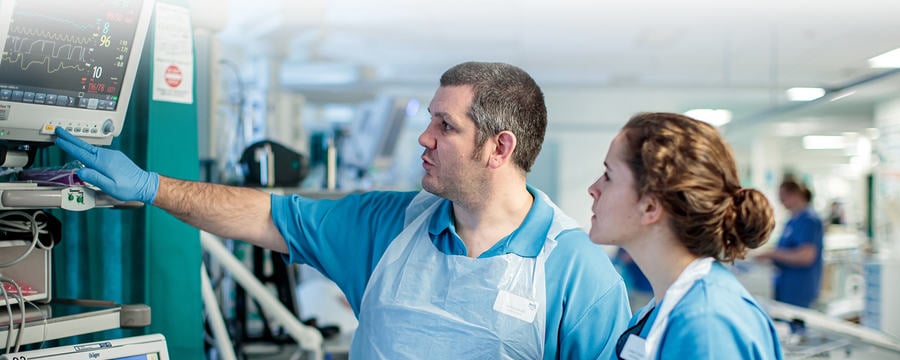
Preparation and planning for emergency airway management, including intubation, is key to good outcomes. The use of a standardised airway trolley, aligned to national intubation guidelines, is recommended. This is a video demonstration of the features and functions of such a standardised airway trolley.
Share this post
This article is from the online course:
COVID-19 Critical Care: Understanding and Application

This article is from the free online
COVID-19 Critical Care: Understanding and Application
Reach your personal and professional goals
Unlock access to hundreds of expert online courses and degrees from top universities and educators to gain accredited qualifications and professional CV-building certificates.
Join over 18 million learners to launch, switch or build upon your career, all at your own pace, across a wide range of topic areas.
Register to receive updates
-
Create an account to receive our newsletter, course recommendations and promotions.
Register for free