
Preparation and tissue depth
In the next few steps, we’ll learn some of the basic knowledge and expertise that is needed in the facial reconstruction process. This includes the muscle groups of the face and the location and tissue depth of each of these muscles.
Before we explore the muscle groups to be assembled, we need to prepare the skull.
To preserve the original skull of the deceased for any future examination and analysis, facial reconstruction is performed on a cast. Alginate is commonly used to create a mould from the original skull and then plaster or resin is poured into the mould to create an accurate reproduction of the original skull.
The plaster cast of Mr. X’s skull, created by Nikki Taylor
The skull is placed onto a specially designed stand and the jaw bone (mandible) arranged in an anatomical position and secured with putty or clay. This needs to be done as the jaw bone is not connected to the skull once the ligaments and tendons are no longer present.
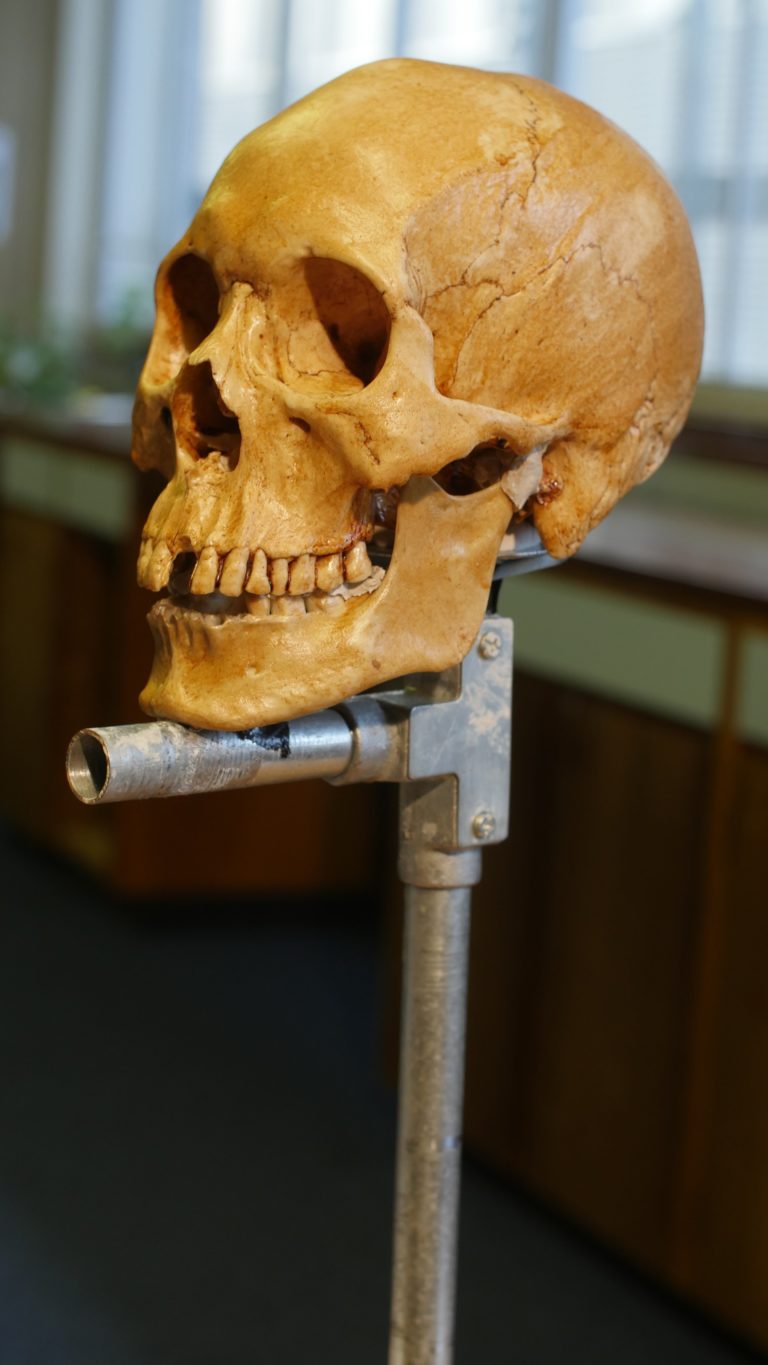
A replica of Mr. X’s skull having been placed on a stand, specially made for facial reconstructions. We can see the clay used to attach the mandible (jaw bone) to the skull
The skull is levelled to ensure it is parallel to the ground by placing a spirit level along the ‘Frankfurt plane’. The Frankfurt plane lies between the lowest point of the eye socket (inferior orbital border) and the ear canal (external auditory meatus).
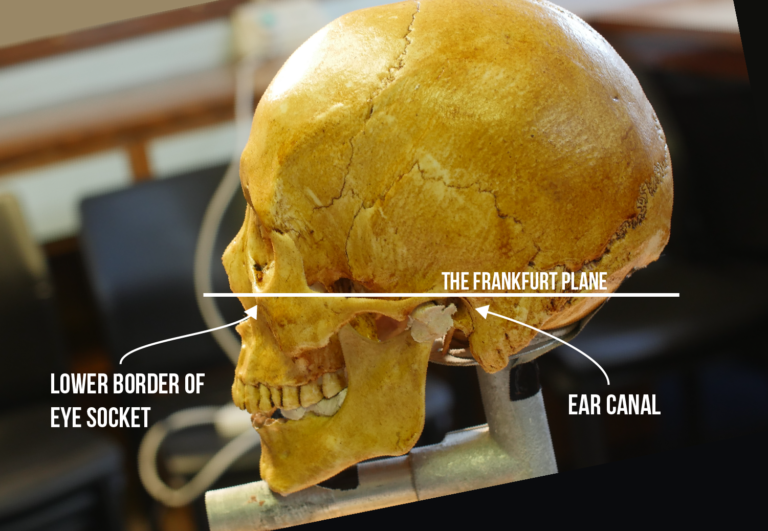
The location of ‘The Frankfurt Plane’
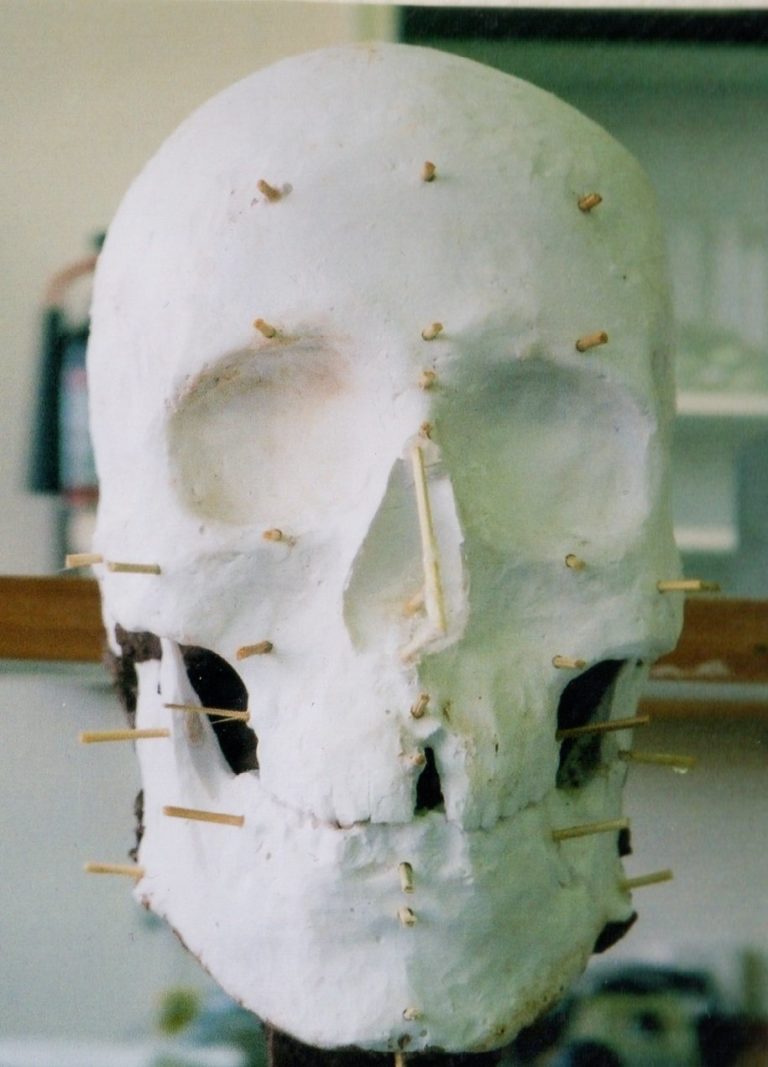
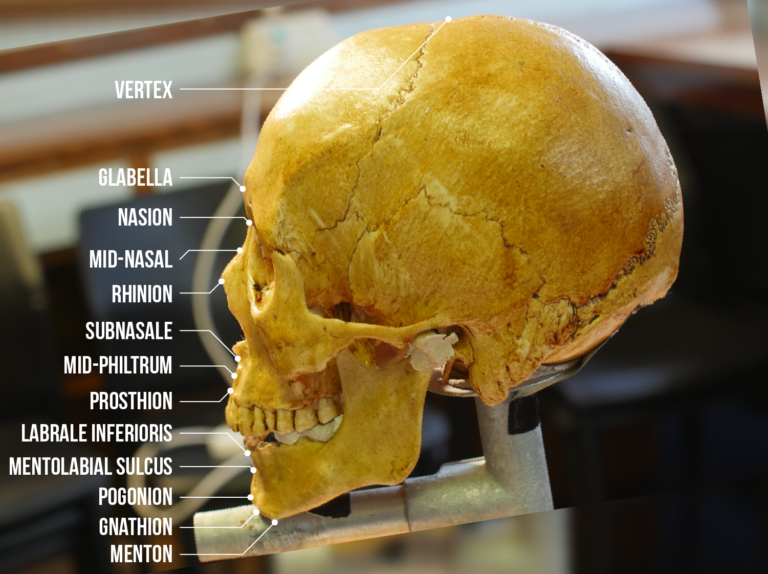
The next step is to attach a series of osteometric markers to the skull. Osteometric markers are landmarks that are attached to the skull and indicate the depth of tissue at a number of points across the face.
Over a century ago, the values of each of these points was defined and agreed to allow researchers to make comparative measurements of the skull (and the rest of the skeleton) in a unified and unambiguous manner. The values of each point were determined by numerous studies of tissue morphology in living and deceased men and women from a range of ancestral groups.
| Landmark | Depth (mm) |
|---|---|
| Glabella | 5.5 |
| Gnathion | 8.5 |
| Gonion | 10 |
| Labrale Inferiorus | 13 |
| Mentolabial Sulcus | 11 |
| Menton | 7 |
| Mid-nasal | 4 |
| Mid-philtrum | 11.5 |
| Mid-ramus | 17.5 |
| Nasion | 6.5 |
| Pogonion | 11.5 |
| Prosthion | 11.5 |
| Rhinion | 3 |
| Subnasale | 13 |
| Vertex | 5 |
| Zygion | 6 |
There are a large number of osteometric points throughout the skull and skeleton. When building a facial reconstruction using clay (the Manchester technique) 16 osteometric markers are usually applied to the face. The markers are often small wooden or plastic pegs and may be glued or screwed to the skull.
A replica of Mr. X’s skull showing the points at which osteometric markers are placed
Once the osteometric markers have been secured, the process of attaching the facial muscles to these points can begin. The markers can now act as an indication of the depth of each of the muscles as they are applied to the face.
Forensic Facial Reconstruction: Finding Mr. X


Forensic Facial Reconstruction: Finding Mr. X
Reach your personal and professional goals
Unlock access to hundreds of expert online courses and degrees from top universities and educators to gain accredited qualifications and professional CV-building certificates.
Join over 18 million learners to launch, switch or build upon your career, all at your own pace, across a wide range of topic areas.


