
Understanding post-processing

Although optical, infrared motion capture systems provide high-quality data in both the spatial and temporal domains, they will most likely include noise and tracking error. In this article, you will learn some more tricks for doing post-processing of motion capture data.
Check for Jitter and Drift
There are many sources of noise in motion capture data. For example, since these recordings are based on light reflected from markers attached to a person’s body, a wobbly marker would result in noisy data. Furthermore, occlusion would cause the marker to disappear entirely in the recording. Hence, some post-processing must occur before the data can be analyzed.
The accuracy and precision of the system can be determined by calculating the noise level of the system. As we discussed in the step on calibration, the system’s noise level can be studied by placing a static marker in the capture space. From these data, it is possible to look at the jitter of the data by calculating the standard deviations (SD) of such a static measurement. This tells something about how much (or little) motion there is in the dataset. The SD value is a rough estimate, but we have found it a useful estimate of the noise level.
Drift is another measure of the quality of a motion capture system. This refers to whether a marker is “moving” over time. The drift can be estimated by applying linear regression to the data of a static marker. The system itself can cause such a drift. This is not common in camera-based motion capture systems but very normal in accelerometer-based systems (more about those later).
Calculating the drift can also be useful in case there are other problems with your recordings. Sometimes we have forgotten to fasten the cameras properly, which has resulted in tilted cameras moving slightly downwards during a capture session. Such problems are clearly visible when looking at regression plots of static markers.
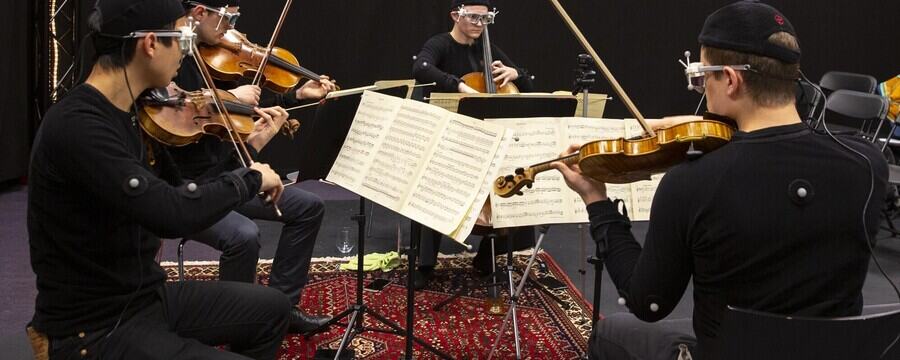
Marker Labelling
When starting on the marker labelling process, all markers show up as unidentified “dots.” Some motion capture systems have predefined models with corresponding marker placements. Running these can be a time-efficient way of identifying most of the dots. In other systems, unidentified dots must be manually identified and labelled after the recording has been completed.
We often find it useful to start the process by discarding irrelevant trajectories. These could be dots of markers that you decide not to include in the further processing, for example, reference markers. It could also be dots that do not represent any of your markers, for example, reflections.
Once all the relevant dots have been identified and labelled, they can be connected with “bones” to create a stick figure. The figure below shows (a) a picture from a recording, (b) the dots in a 3D environment representing the markers as recognized by the software, and (c) the representation of the markers after they have been manually identified and connected by “bones.”
Gap-Filling
As previously described, an infrared motion capture system relies on the capture of (reflected) light by the cameras. Thus, if a marker becomes occluded or moves outside the capture space, it will disappear in the recording. This results in so-called dropouts, and it leaves gaps (missing frames) in the data set. Shorter gaps can be gap-filled using various interpolation techniques to estimate the trajectory between known data points mathematically. However, gap-filling should only be used for short gaps. For longer gaps, the data may not be estimated correctly mathematically.
The simplest gap-filling method is linear interpolation, meaning that a straight line is drawn between two known data points. Spline interpolation, on the other hand, produces a curved trajectory between known data points. The figure below shows (a) the original data with the gap and two techniques for gap-filling: (b) linear and (c) spline interpolation.

Given the “curvy” and variably paced nature of body motion, spline-based interpolation techniques are often common. However, in the case of a “false” sudden rise or fall before a gap—for example, if a participant accidentally touched the marker before it disappeared—spline interpolation would most likely continue the false motion by producing an artificial bump in the trajectory. In contrast, linear interpolation would draw a straight line between the known points. So it is always important to visually inspect the data while working on gap-filling.
Smoothing
In many cases, it may be useful to smooth the data some time in your post-processing chain. This is to “remove” noise or artefacts due to, for example, gap-filling, tracking error, unstable markers, marker occlusion, or calibration quality.
Running a moving average filter is the simplest way to smooth a data stream. This is based on calculating the average of a specific number of frames. The more frames you average over, the higher smoothening effect. Be careful, though, as it is easy to overdo the smoothing. Any such operation may also remove important parts of the data.
Better smoothing can be obtained using more advanced digital filters. For example, the Motion Capture Toolbox from the University of Jyväskylä offers two filtering options, a fast Butterworth filter and an accurate Savitzky-Golay filter.
Exporting data
After the marker labelling and gap-filling are completed, the motion data is usually exported for further processing or analysis in other software. Unfortunately, there is no standard file format for motion capture files, but most software can export to many different formats. We often prefer to work with open, text-based formats, such as CSV or TSV files. Sometimes, it may be more efficient to work with a binary and compressed file format, such as C3D or MAT.
Whatever file format you end up exporting, it is crucial to always keep the original data near at hand. You may find that there were problems with your labelling or gap filling. Then you need to go back to the original data to correct your errors before exporting new files for further analysis.
Summary
Post-processing involves several steps: check your data quality, labelling markers, filling gaps, and smoothing noisy data. It is important to have this process in mind when setting up for your capture sessions. Post-processing will be much simpler if your setup minimizes marker dropout.
References
- Burger, B., & Toiviainen, P. (2013). Motion Capture Toolbox – A Matlab toolbox for computational analysis of movement data. Proceedings of the 10th Sound and Music Computing Conference, (SMC), Stockholm.
- Nymoen, K. (2013). Methods and technologies for analysing links between musical sound and body motion. (PhD Thesis). University of Oslo, Oslo.
Motion Capture: The Art of Studying Human Activity

Motion Capture: The Art of Studying Human Activity
Reach your personal and professional goals
Unlock access to hundreds of expert online courses and degrees from top universities and educators to gain accredited qualifications and professional CV-building certificates.
Join over 18 million learners to launch, switch or build upon your career, all at your own pace, across a wide range of topic areas.


