
How to Splint Permanent Incisors
If you’ve never splinted a tooth before then the first time can be quite daunting. Below is a simple step-by-step tutorial to guide you through the process. Obviously, every trauma will be slightly different. Our aim here is to concentrate on the technical aspects of the procedure. Always apply a splint to the labial surfaces, never palatal or lingual, as this will affect the occlusion and make it much harder to remove!
How to Splint Permanent Incisors: Scenario
Patient presenting who needs a flexible splint following trauma to one tooth. Therefore, the design will be to include three teeth on the splint – the traumatised tooth and one either side.
We’ll be using orthodontic wire as this is readily available. Other options could be fishing line or titanium trauma mesh splints.
Step 1
Cut and bend an appropriate length of wire so that it roughly follows the outline of the arch. It’s often easier to bend it before cutting to the exact length. 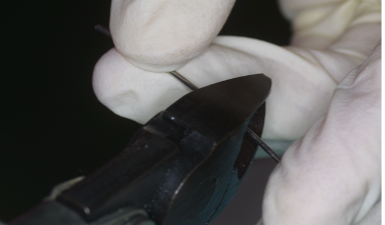
Step 2
Prepare the child, make sure you have good isolation (cotton wool rolls are OK), make sure you have control of the head. Your nurse needs to be ready, and you need to have everything to hand as once you start, you can’t stop.
Apply etch to the centre of the teeth. Do not cover the whole labial surface with etch. Make sure you place it only where you want the composite to be. After you have rinsed off the etch, then follow with the bond step. Sometimes we skip the bond step as it makes the splint easier to remove. But this might not be a good idea if the splint has to stay on for more than a couple of weeks. 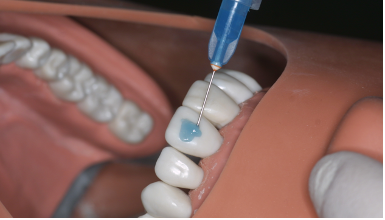
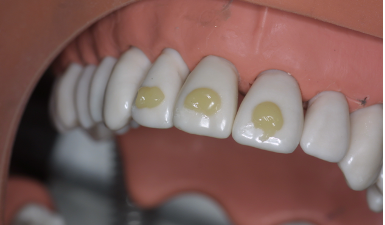
Step 3
Place composite on the buccal surface of the teeth. Be neat. Just enough so that you can hold the splint in place. Once you have the splint in position, cure this composite.
Then apply some more composite on top to hold the splint firmly. It’s important to apply the composite in a controlled way, you don’t want it going everywhere.
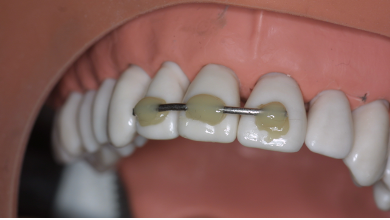
And voila — all done.
Paediatric Dentistry for Non-Specialists


Reach your personal and professional goals
Unlock access to hundreds of expert online courses and degrees from top universities and educators to gain accredited qualifications and professional CV-building certificates.
Join over 18 million learners to launch, switch or build upon your career, all at your own pace, across a wide range of topic areas.


