
The tri-hexaflexagon
My first flexagon
This is your first experience with folding a flexagon. The way we’re going to work in this course is as follows:
- Download the file below which has the templates for the back and front of the paper strip that will be folded into a tri-hexa-flexagon.
- Print the two templates using a colour printer.
- Glue together the back and the front, so that the paper strip is printed on both sides. Make sure you do this the right way, and that your back and front are correctly positioned. The order of the coloured triangles on one side from left to right should be red, blue, blue, yellow, yellow, red, red, blue, blue, yellow; On the other side, when you turn over the strip from top to bottom you should have, from left to right: white, yellow, red, red, blue, blue, yellow, yellow, red, white.
- Crease the paper along the diagonal lines, back and forth, so that the paper is flexible and easy to work.
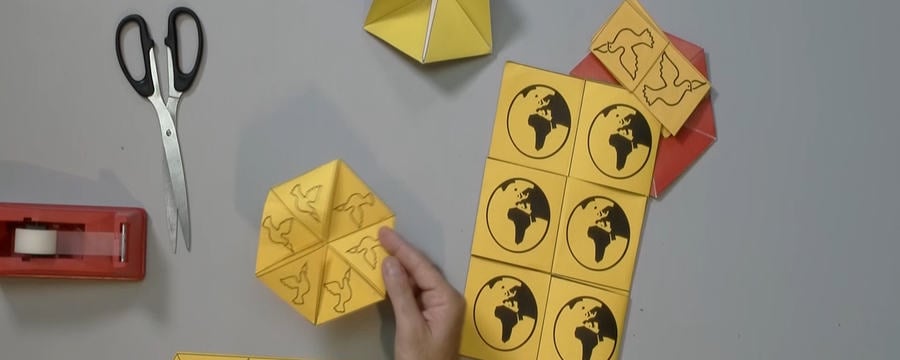
- Fold the paper strip into a hexagon with the two white triangles creating a ‘flap’. Make sure you fold same-coloured triangles together. Glue or tape the flaps to each other, and that’s it!
You’ll be able to see two faces or sides of the flexagon, once it’s assembled. The blue and the red sides. To expose the third face, you’ll have to do the pinch flex, as shown in the video. This might be a bit tricky at first, but please don’t give up! You’ll get it in the end.
Pats and Leaves
One common mistake happens when the three-pointed propellor shape doesn’t open from the center. To remedy this all you have to do is switch the directions of all the folds between the triangles. Mountain folds should be changed to valley folds and vice-versa. This happens because of the basic structure of the flexagon. Rotate the flexagon in your hand moving from triangle to triangle. You’ll find that the thickness of the flexagon alternates between stacks of either 1 or 2 ‘leaves’. These stacks of leaves are called ‘pats’. So, this flexagon has 6 pats, alternating between 1 or 2 leaves thick as we rotate the flexagon in our hand. The number of the leaves (the visible side of them) on a face is equal to the number of pats.
Fun with the tri-hexa-flexagon
After a bit of practice you’ll be fluent and will be able to cycle through the 3 faces of the flexagon over and over again. You might want to start exploring your flexagon right away. Try attaching a paper clip to one of the triangles and see how it circles around the flexagon in different positions. If you draw some lines or dots on all of the triangles on all of the faces, you’ll be able to see some pretty patterns emerging, once you flex. Draw a straight line from the centre of the flexagon to the edge of each triangle so that it bisects the angle. Flex the flexagon! What happens to the line?
Discussion
Did you enjoy folding the flexagon? Did you have difficulties? Did you discover tricks that you would like to share with the other learners?
Flexagons and the Math Behind Twisted Paper

Flexagons and the Math Behind Twisted Paper
Reach your personal and professional goals
Unlock access to hundreds of expert online courses and degrees from top universities and educators to gain accredited qualifications and professional CV-building certificates.
Join over 18 million learners to launch, switch or build upon your career, all at your own pace, across a wide range of topic areas.


