Home
/ Science, Engineering & Maths / Maths / Flexagons Galore: Advanced Flexagon Fun / A tuck flex only flexagon

A tuck flex only flexagon
Watch to learn how to fold a tuck flex only flexagon
Fold a tuck flex only flexagon
Fold the tuck flex only flexagon by following these instructions:
- Download the file below (template number 8 in the flexagon booklet) which has the templates for the back and front of the paper strip that will be folded into a tuck flex only flexagon
(Credit: Scott Sherman for research and educational use only)
Important – there are two templates on each side for two different versions of the tuck flex only flexagon. You can choose either – or both!
- Print the templates using a colour printer.
+ Cut out the shapes. - Glue together the backs and the fronts of the flexagon, so that the paper strip is printed on both sides.
- Crease the paper along the dashed lines, back and forth, so that the paper is flexible and easy to work. If there are solid lines on the template – cut along them.
- Fold the adjacent 3’s together and then fold the paper strip into a hexagon
- Tape the first and last dashed edges together, and that’s it!
Practicing the tuck flex
Watch the video again to practice the tuck flex! It will take some time to learn. Here is a step by step image of the manipulations needed to make the flex. You might find this easier to follow.
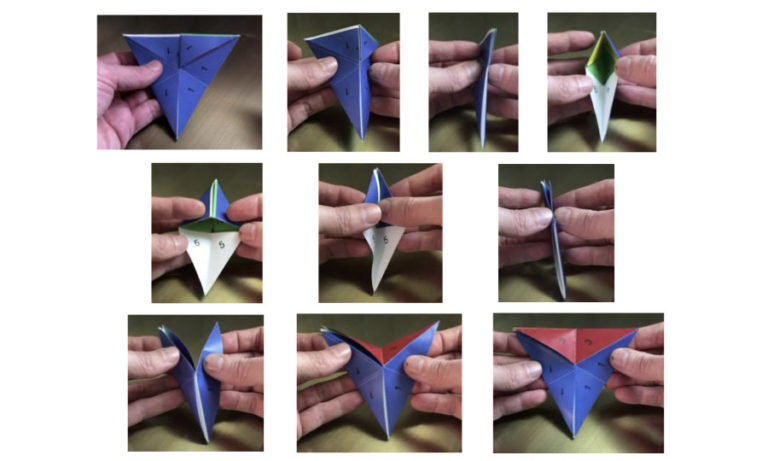
You might want to take a look at the tuck flex explained on Scott Sherman’s website in the related links below.
Discussion
Do you have any questions about the tuck flex only flexagon?