Skip main navigation

Introducing the film image

In this step we introduce the film and how it can be used for language teaching and learning.
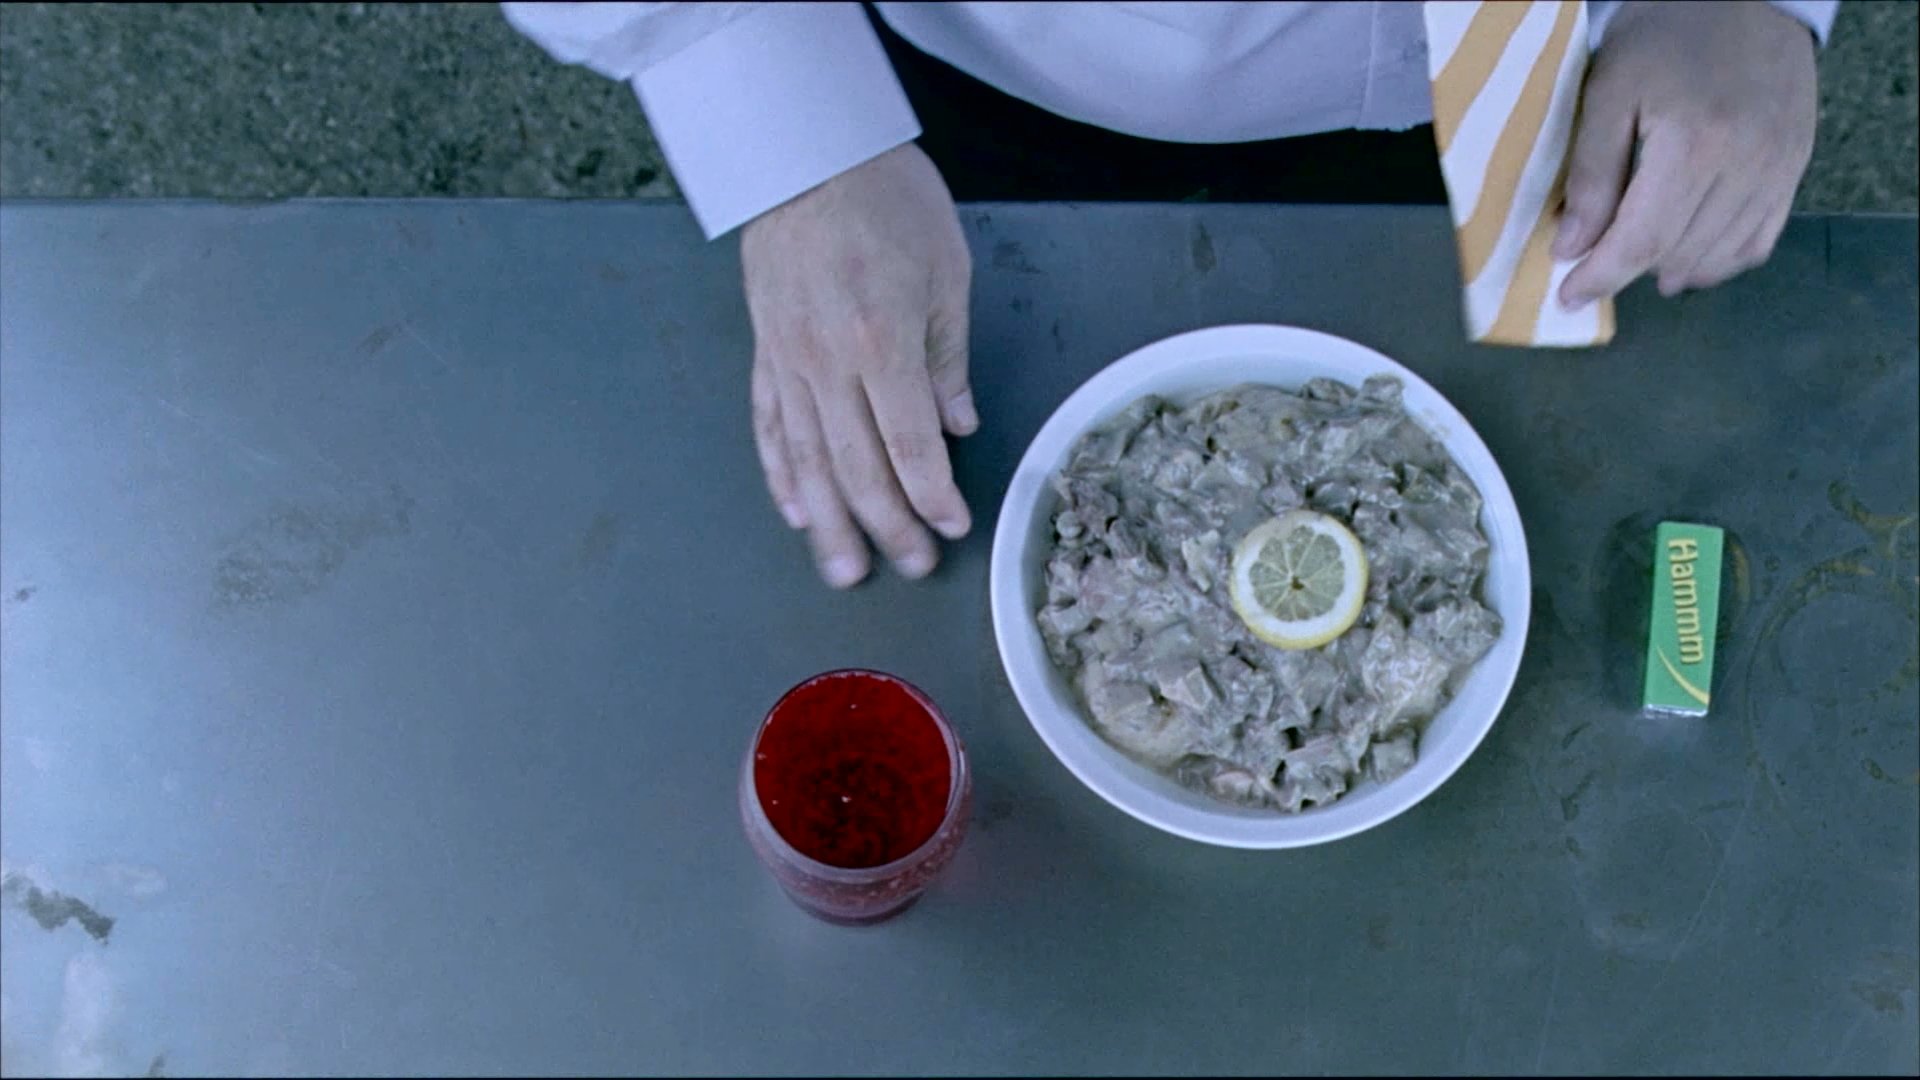
Birds eye view close up shot of a man eating at a cafe from the film Szalontudo
© Gyorgy Palos

Welcome back! We hope you enjoyed Week 1 of the course and now have a better idea as to how you can use short film sound in your classroom to support language learning. Have you had a chance to try any of the activities out with your learners yet? If so please do share your experiences in the comments section.

Welcome to Week 2 where we will explore the film image in relation to language teaching and learning. Just to remind you that you can view, download and use the collection of short films used on this course on a private Vimeo playlist, accessible only by participants on this course. Please use the following password to access the films on the Vimeo playlist: SFLT. Please note that this password is case sensitive. All the resources you’ll need for Week 2 can be downloaded in both Word and PDF format in the download section, as well as on each step.

Please take the course at your own pace and do not feel obliged to complete every single activity. It may however, be useful to build up a collection of padlet resources (either resources that you have created/used throughout the course, or resources which other learners have shared to padlet) to use in the classroom once you have finished the course.

Introducing the film image

In many ways the image is the ‘default’ element of film analysis: people often think of film automatically as a ‘visual’ medium. We started this course in Week 1 with a consideration of the importance of sound, primarily to counter the notion that image is everything. But of course, what’s put on screen is fundamental to the stories that film tells.

In this week, we will explore how the film image works, how to analyse it, and most importantly, how to use this understanding to scaffold language learning.

One of the successful ways teachers have found of breaking down film language to support their learners’ understanding and language acquisition is to use stills extracted from film sequences. In this step we have taken out a still image from one of the short films on the course – not one that you will have seen yet – to help you focus on the more detailed information that can be found in the film image. The still is at the top of this page.

Activity

So, what information can you pick up from the image? If it helps, use the ‘Tell Me’ grid resource in the download section which addresses the image by asking you to look at Character, Setting, Colour, and Props. These are some of the elements of the ‘composition’ of a shot (we can also look at Dress or Costume). ‘Composition’ is one of our Cs and Ss (see Week 1, Step 1.5) – it’s a simpler name for what film studies scholars call ‘mise-en-scène’, a French phrase meaning ‘what’s put in the scene (or shot)’.

What story information is offered through the image at the top of the step? How is the character portrayed? Add as much information as you can to the grid. Post any comments you have about this activity in the comments section.

© British Film Institute
This article is from the free online

Short Film in Language Teaching

Created by
FutureLearn - Learning For Life

Reach your personal and professional goals

Unlock access to hundreds of expert online courses and degrees from top universities and educators to gain accredited qualifications and professional CV-building certificates.

Join over 18 million learners to launch, switch or build upon your career, all at your own pace, across a wide range of topic areas.

Start Learning now