
How does an infrared motion capture system work?

An infrared motion capture system works by estimating the three-dimensional (3D) positions of reflective markers using the two-dimensional (2D) view from multiple cameras. In this article, we will go through some of the most important terms and concepts.
What is triangulation?
Converting a set of 2D images to a 3D representation is known as triangulation. During this process, the 2D position of a point from two or more cameras is overlapped and processed to reconstruct a common 3D point. The figures below illustrate how an IR motion capture system can calculate 3D marker positions.
 \"Methods and technologies for analysing links between musical sound and body motion")
For such a triangulation to work, the system needs that at least two cameras see the marker of interest. Thus, triangulation accuracy is strongly related to the positions and orientations of the cameras and marker placement. Consider the possible orientations that two cameras can take relative to each other. At one extreme, they are parallel, facing the same direction (0 degrees apart). At the other extreme, they point in opposite directions (180 degrees apart) and do not capture the same space at all. None of these setups would work.
To minimize tracking errors in a 3D space, it is best to orient the two cameras in between these extremes – at a 90-degree angle to each other so that their capture spaces overlap. Larger numbers of cameras can be oriented in clusters. For example, we typically place cameras at regular intervals around the perimeter of our lab, forming a rectangle.
Defining a Capture Volume
Designing an optimal camera setup involves defining a capture volume, the region of interest in the space. The capture volume depends on the task we want to record and the space needed to perform the task. The size of the capture volume is limited by the size of the physical space, the number of cameras available, and the overall setup of the equipment.
Setting up a large capture volume requires longer distances between cameras (longer cabling) and more cameras to capture all the regions within the space. On the other hand, a small capture volume might limit the range of movement and the possible number of simultaneous participants.
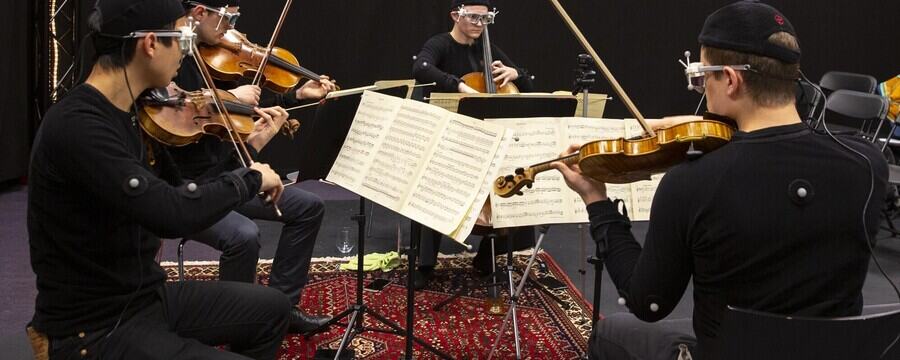
It is also important to keep in mind that cameras do not track well when the markers are too close or too far away. Here, the size of the markers is also relevant. Markers come in all sizes (see figure below).

If you need to use tiny markers, for example, to capture finger movements, these may not be detected by cameras that are far away. The maximum capture distance for a standard size of marker can be found in the technical details given by the hardware manufacturer.
Minimizing Marker Occlusions
Occlusions occur when a marker is hidden from the sight of the cameras. This can happen because another object or the participant’s own body gets in the way, disrupting the line of sight. Occlusions are problematic because they result in data loss – marker positions are not recorded if the markers cannot be seen.
Many occlusions can significantly complicate the marker labelling. This is the process in which marker trajectories are identified as belonging to a certain object or body (see the section on Post-processing for a detailed discussion). A trajectory can be thought of as continuous marker data. Most systems start recording a new trajectory if the marker is occluded. Thus, if there are many occlusions, there may be many short trajectories. This again requires a lot of manual work when labelling each segment.
When there are many occlusions to markers positioned close together, automatic labelling procedures (a common function in motion capture software) can also be disrupted. Trajectory segments may be grouped erroneously, causing labels to jump between one marker and another.
Therefore, when deciding on camera placement, it is necessary to think through how occlusions might arise and position cameras to capture markers from different angles simultaneously.
Selecting Camera Settings
The final step in preparing cameras for recording involves choosing the capture settings. Many systems allow the user to change the detection threshold of individual cameras. Reducing the threshold increases the sensitivity of the camera to small amounts of light. This may be useful if the cameras fail to detect markers reliably. However, it also increases the likelihood that stray reflections will be captured and mistaken for markers. Increasing the threshold, conversely, reduces the camera’s sensitivity to light and may be useful if the cameras are picking up a lot of small reflections in addition to the markers of interest.
Also important is selecting an appropriate frame rate for your recording. What constitutes an “appropriate” frame rate is dependent on the type of movement that you will capture, its expected rate, and the spatial distance between markers. Fast-moving markers positioned close together (such as on a pianist’s fingers) require a very high frame rate (500 Hz or more). Otherwise, it may not be possible to distinguish between different marker trajectories or track trajectories sufficiently. For slower movement of more spread markers, a frame rate of about 120 Hz is commonly used.
It may also be necessary to adjust the camera settings to other equipment being used. We will later look at integrating infrared motion capture with video recordings, accelerometers, and muscle sensors. If a video recording runs at 50 fps, it may be best to run the motion capture system at 100 Hz to avoid problems when down-sampling the data for comparative analyses.
Summary
In sum, the way you arrange your cameras and choose your exposure thresholds and frame rates partially determine how successful your capture will be. A non-optimal camera setup will increase the likelihood of marker dropout and data loss. We recommend carrying out pilot tests to see whether your planned camera setup will successfully capture all of your markers.
Motion Capture: The Art of Studying Human Activity

Motion Capture: The Art of Studying Human Activity
Reach your personal and professional goals
Unlock access to hundreds of expert online courses and degrees from top universities and educators to gain accredited qualifications and professional CV-building certificates.
Join over 18 million learners to launch, switch or build upon your career, all at your own pace, across a wide range of topic areas.


