Skip main navigation

New offer! Get 30% off your first 2 months of Unlimited Monthly. Start your subscription for just £29.99 £19.99. New subscribers only. T&Cs apply

Find out more

Part 1: Investigating the external structure of the heart

Heart dissection demonstration to investigate the external structure of the heart for a Beginner's guide to Heart Health by the University of Reading.
2.8
If you have all the required items and you’ve read through the risks, then let’s make a start. The first thing we’re going to do is we’re going to weigh our heart. So using one hand if you can, so the other hand stays clean, pop the heart on the scales and note down on the worksheet the weight of your heart.
23.4
The next thing we’re going to do is we’re going to start by observing the heart. There’s several things that you can notice about the heart straight away. We can see the general shape is that we’ve got a roundish or flattish base coming down to a softly pointed apex. You can see that often in the process of preparing the heart for food– we bought this heart from a food source– the heart may be damaged. Your heart may actually have cuts or slices into it. And often the top of the heart has been removed. So, clean hand here. We can see that the heart that we have looks pretty similar to this one here. We’ve cut through, revealing the two atria.
68.6
So here this one as well, it’s been cut through, revealing the two atria and then the two blood vessels that we can see. You might be able to orient your heart in terms of left and right, front and back, just by looking at it. But we might find it easier if we actually feel the heart, and this we do through palpation, or touch. So let’s have a feel of the heart. If you feel each side to the heart, one side might feel firmer, and the other side might feel softer. From our theoretical knowledge about the anatomy at the heart, we know that the left side has a thick muscular wall and the right side a thinner one.
111.2
So on the left side, we’d expect it to feel that bit firmer, and on the right, that bit softer. And this gives us clues as to our orientation.
123.2
We can also use the major vessels to try and orient our heart, and we may be able to see them. Depending on your specimen, you may have more of the major vessels. This heart here we can see has been cut through. So it’s been sliced across the top. And we can see here there’s two kind of obvious vessels and then two open areas. These are our two atria, and these are our two blood vessels here. This might give us clues to the orientation.
157.1
We can also see the minor blood vessels wrapping around the outside of the heart. They’re very hard to see, and they often follow the fat layers here. So you can see, this is our tiny coronary arteries. These are the vessels that supply the heart muscle with the vital blood and oxygen that it needs to contract. If you interrupt the flow of blood along one of these vessels, you’ll starve the tissue downstream of that area of oxygen. And this is what happens during a heart attack. One of these tiny vessels - not the big vessels, the tiny vessels - gets blocked and starves the tissue of oxygen.
200.4
We can try to confirm our orientation by probing the heart. So let’s have a go at that. We can use a probe such as this, or you can just use a ballpoint pen. What we’re going to do is we’re going to insert the probe into each of the holes, and we’re going to feel where it seems to come out. So let’s start with these two big vessels at the top here. We’re going to insert the probe into that vessel and see where it comes out. So it seems to come out down the bottom here. If I feel that edge there, it’s quite thick. Let’s compare that to if we pop the probe into the other vessel.
247.2
And you can see that coming out on the other side here, and that feels slightly thinner. There’s less distance between the probe and my finger.
258.5
We can also use the probe to probe through the other holes. So let’s try on this side. That seems to come up in the same kind of area, that thicker area, as the big central vessel. Whilst if we try the other side, it’s coming up again on this side here where it seems much thinner. So this thinner side is likely to be the right side of the heart, whilst this thicker side is the left side of the heart. That helps us confirm our orientation then. When we put the probe through the vessel at the front here, it came out on the right hand-side of the heart. That means that this vessel is the pulmonary artery.
305.8
So this here is the pulmonary artery. When we went through the middle vessel, the vessel that sat in the centre, it comes out down the bottom here on the left side of the heart where it’s slightly thicker tissue. So this must be our aorta. We also get clues by looking at the vessels where they’re still intact. These vessels here are both fairly thick walled, which indicates that they’re arteries. So now we know that with this heart, we have our left-hand side, our right-hand side, and this is the front where we have the vessel towards the front. And where we can see the two atria, that’s the posterior area, or the back.
351.9
Now that we’ve explored the outside of the heart, let’s have a look at the inside.

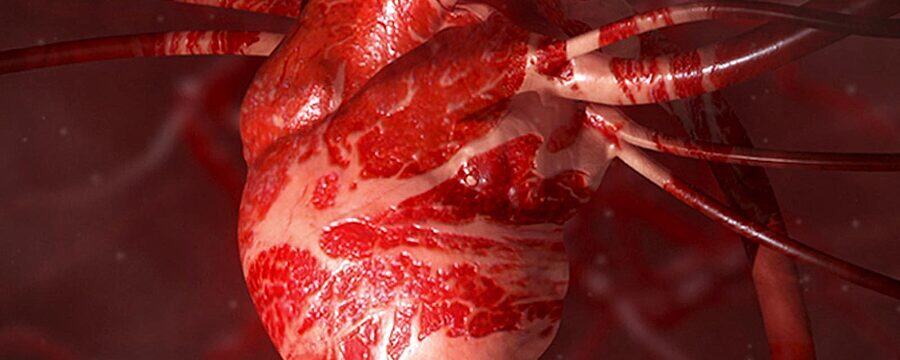
In this video we start by looking at the external structure of the heart. By the end of this practical you should be able to:

  • Identify the left and right sides of the heart
  • Identify the major blood vessels as they enter and exit the heart
  • Identify the minor blood vessels that supply the heart muscle
  • Identify the myocardium and understand how the thickness of the heart wall relates to its function
  • Identify the heart valves and chordae tendineae and understand how they prevent back flow of blood

You can download a printable version of the Week 1 home practical guide: Investigating the structure of the heart.

In the next step we’ll investigate the internal structure of the heart.

Dr Natasha Barrett and the University of Reading are happy for these videos to be used as learning resources in teaching. If you do wish to use the home practical videos, please ensure that you also include the safety information which accompany each practical. The safety video for this practical is in Step 1.13 and in the article in Step 1.14. If you wish to use the video or any other video on the course, please attribute the University of Reading. Please do not modify any of the videos from the course.

This article is from the free online

Heart Health: A Beginner's Guide to Cardiovascular Disease

Created by
FutureLearn - Learning For Life

Reach your personal and professional goals

Unlock access to hundreds of expert online courses and degrees from top universities and educators to gain accredited qualifications and professional CV-building certificates.

Join over 18 million learners to launch, switch or build upon your career, all at your own pace, across a wide range of topic areas.

Start Learning now